Categories
Informational

Redmineflux Managed Cloud: What Managed Redmine Hosting Looks Like in Practice

Redmine is self-hosted by design. That gives your team full data ownership and complete control over the environment. Many teams choose Redmine precisely because of that characteristic.

But self-hosting also means your IT team owns everything that keeps Redmine running. Upgrades, backups, plugin compatibility, and every unplanned outage all of that lands on your plate. The software is free; the operational overhead is not.

For some teams, that trade-off works perfectly. For others, it quietly becomes the reason Redmine never gets the attention it deserves. Upgrades get delayed because nobody has bandwidth. Plugins fall behind compatibility. The server runs fine until it does not. And every time something breaks, someone who should be building products spends a day diagnosing infrastructure instead.

Redmineflux Managed Cloud exists for teams that want Redmine the data ownership, the plugin depth, the structured workflow without the infrastructure work that gets in the way.

What Self-Hosting Redmine Actually Involves

Self-hosting Redmine is not complicated for experienced engineers. But it requires genuine, ongoing effort that most teams underestimate before they commit.

First, someone needs to provision and maintain the server itself. That means selecting the right environment, installing the correct Ruby and Rails versions, setting up the database, and keeping system dependencies current. Then comes the Redmine installation migrations, configuration files, file storage, and initial setup. None of this is a one-time task. Every time Redmine releases a new version, the upgrade path runs through schema migrations and plugin compatibility checks. If you run a plugin that has not released a compatible version yet, you wait or you upgrade without it and deal with the consequences.

Plugin management deserves its own mention. Installing a Redmine plugin involves placing files, running bundle install, executing migrations, and restarting the server. Doing this across ten or fifteen plugins and keeping them all compatible with each other and with the Redmine version you run is a maintenance project on its own. Backups require a strategy, a schedule, and someone who tests restoration regularly. SSL certificates expire. Email configuration for notifications needs setup and monitoring. And when the server goes down, your team’s project management goes down with it and your IT team owns the incident.

None of this is unreasonable. It is simply honest about what self-hosting Redmine requires from the people responsible for it.

What Redmineflux Managed Cloud Covers

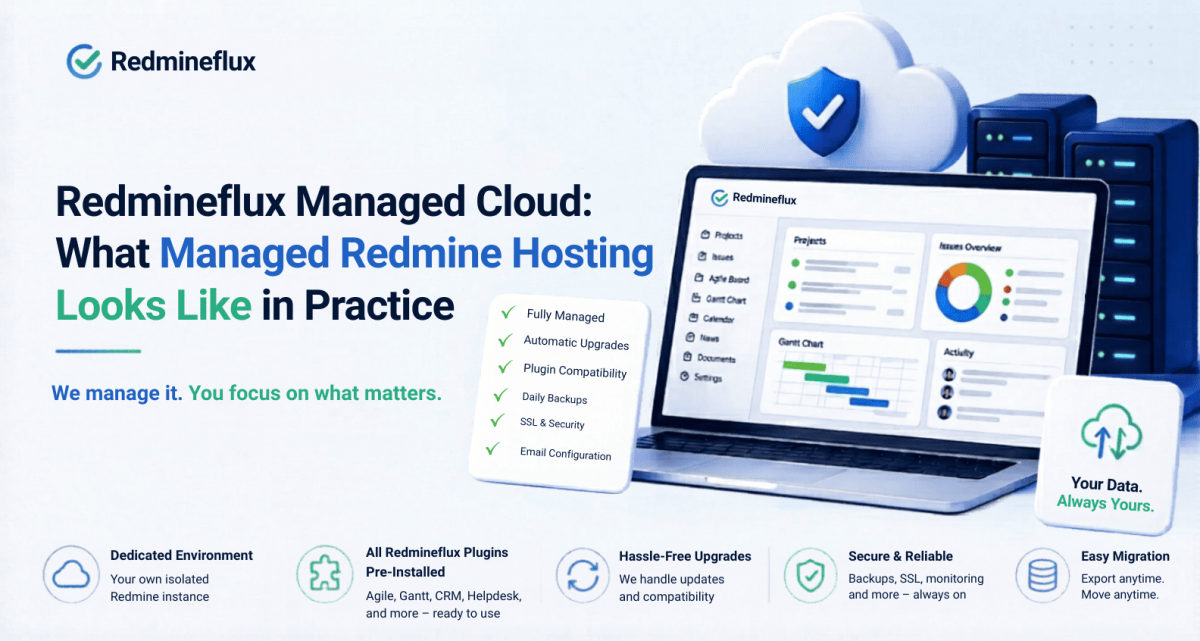
Answer capsule: Redmineflux Managed Cloud provides a fully hosted Redmine environment with all Redmineflux plugins pre-installed. The Redmineflux team handles infrastructure provisioning, Redmine version upgrades, plugin compatibility management, daily backups, SSL, and email configuration. Teams get a production-ready Redmine instance without managing a server.

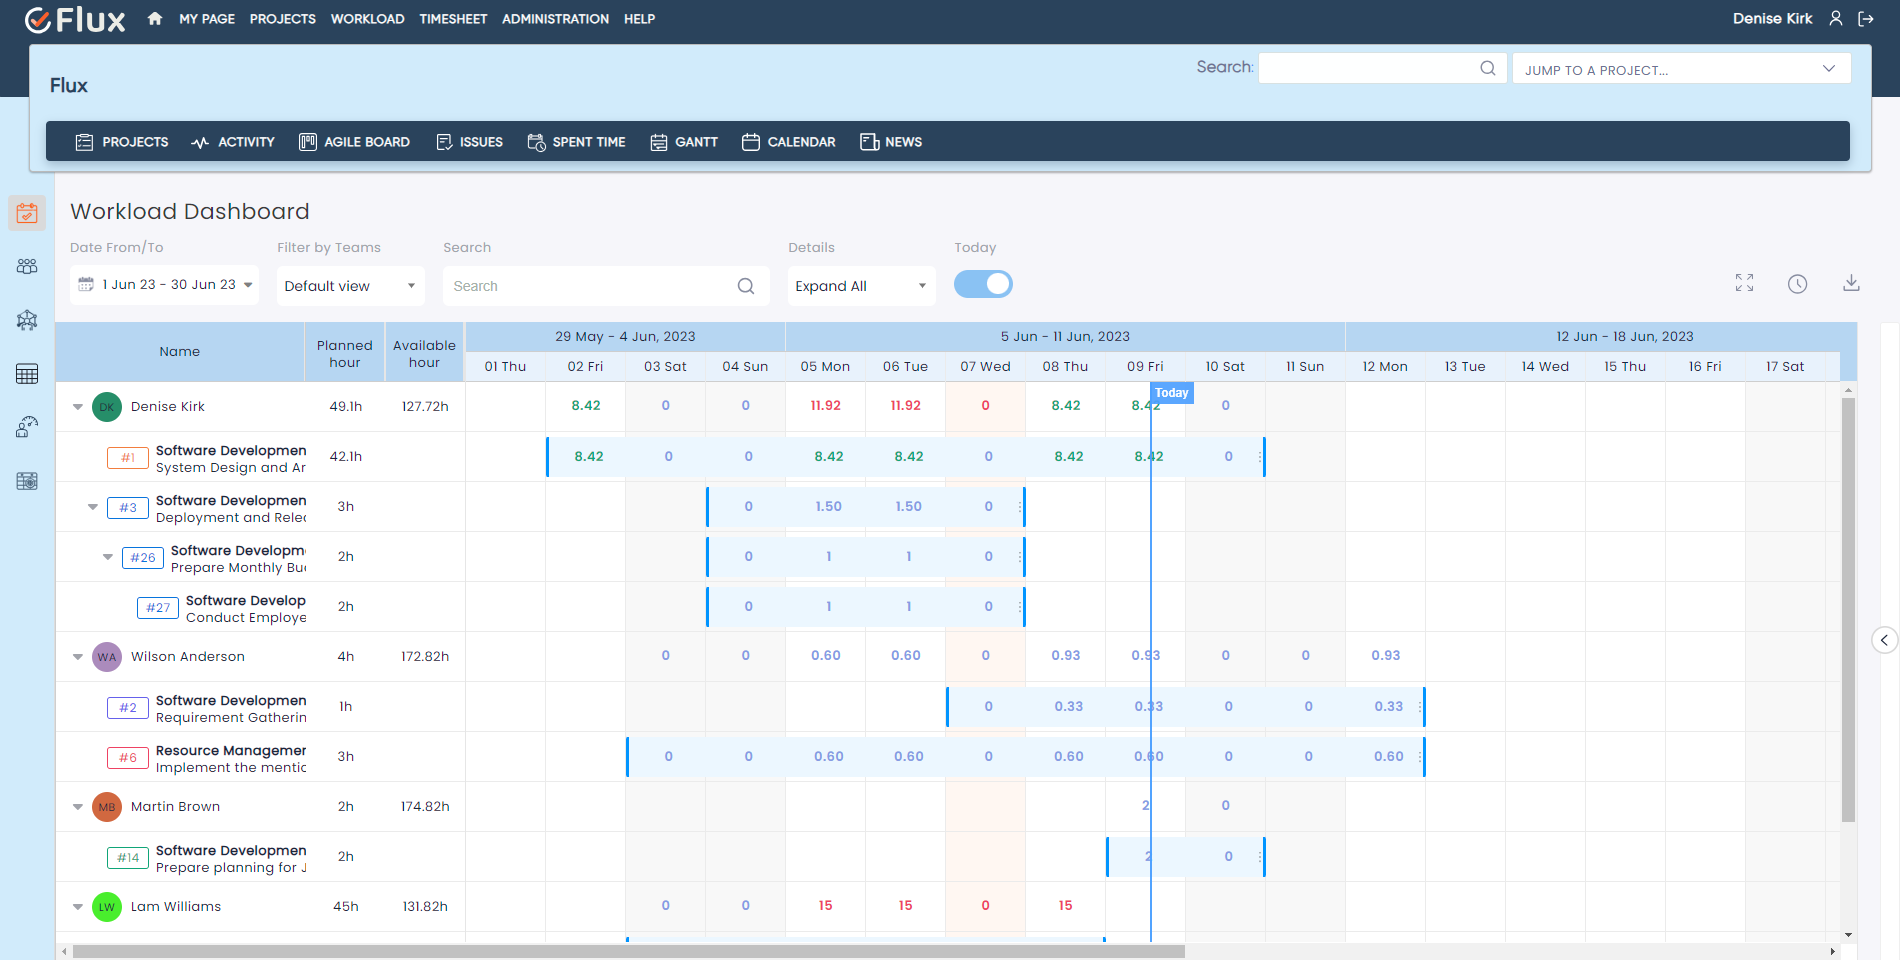
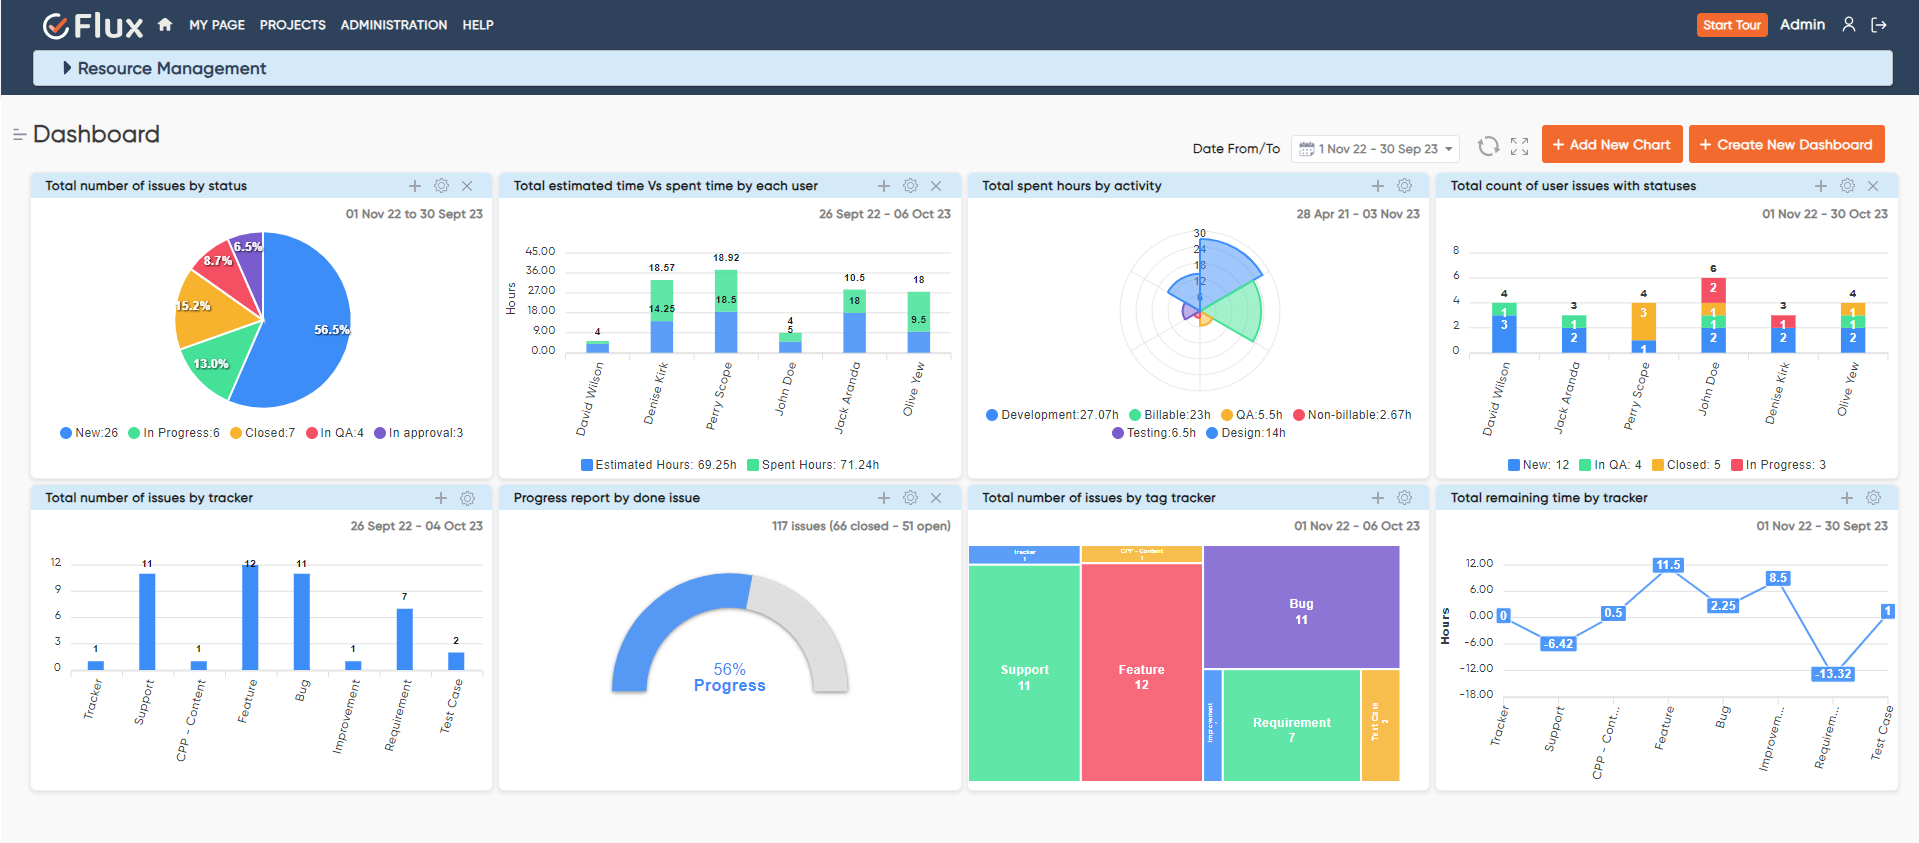
When your team joins Redmineflux Managed Cloud, the team provisions the environment before you log in for the first time. Your instance arrives with the full Redmineflux plugin suite already installed and ready. Agile Board, Gantt Chart, Timesheet, Workload, Custom Dashboard, Knowledge Base, Helpdesk, CRM all of them sit in your Redmine instance from day one. No installation steps. Skip bundle installs. Forget migration scripts.. Your admin opens the browser and starts configuring projects.

Managed upgrades work differently from what most self-hosted teams experience. When Redmine releases a new version, the Redmineflux team handles the upgrade cycle. They test plugin compatibility across the full suite, run the schema migrations, and move your instance to the new version. Your team notices the version number changed. They do not notice a maintenance window, a compatibility failure, or a broken plugin that someone needs to diagnose. The Redmineflux team treats that process as their responsibility because in Managed Cloud, it is.

Data ownership in Managed Cloud works differently from most SaaS tools. Many SaaS project management platforms store your data in a shared multitenant system where export options are limited and migration is difficult by design. Redmineflux Managed Cloud gives each customer a dedicated environment. You can export your data at any time. If your team ever decides to move to self-hosted Redmine, that migration path exists and the Redmineflux team supports it. Your data belongs to your team the hosting arrangement does not change that.

Self-Hosted vs Managed Cloud — Which Fits Your Team

This is not a question with one right answer. Both options serve real teams with real reasons for choosing them.

Self-hosted Redmine makes sense when your team has in-house DevOps capability and wants complete control over the environment. Teams in regulated industries government contractors, healthcare, finance sometimes require on-premise infrastructure for compliance reasons, and self-hosting is the only path that satisfies those requirements. Teams that want to control the upgrade schedule, hold a version stable for extended periods, or make deep customisations to the Redmine codebase also have good reasons to own the infrastructure themselves.

Managed Cloud makes sense when infrastructure overhead sits in the way of Redmine adoption. Teams without a dedicated server admin, teams that have deferred upgrades for months because no one has bandwidth, teams where the IT director wants to reduce operational load on internal tooling these teams spend less time on maintenance and more time on the work Redmine was installed to manage. It also makes sense for teams that want to start quickly. A self-hosted deployment takes time to provision correctly. Managed Cloud removes that setup project entirely.

The honest framing is this: self-hosting gives you full control, and Managed Cloud transfers the maintenance responsibility without transferring data ownership. Choose based on your team’s actual capacity and compliance situation.

Getting Started with Redmineflux Managed Cloud

The setup process for Managed Cloud does not involve your IT team standing up a server. The Redmineflux team provisions the instance on their infrastructure after you sign up.

Your admin receives access credentials for a configured Redmine environment. All plugins are already enabled. From there, your admin configures the things that should belong to your team projects, trackers, workflows, custom fields, user roles, and permissions. That configuration work is the same whether you run self-hosted or Managed Cloud. The difference is that everything underneath it the server, the database, the SSL certificate, the email configuration, the backup schedule already works.

Ongoing, your team uses Redmine. The Redmineflux team handles upgrades, backups, and infrastructure. Support is available for configuration questions when your team needs guidance on Redmine settings or plugin behaviour. The goal is a Redmine environment your team maintains for your work, not one that requires ongoing technical management just to stay operational.

How Managed Cloud Connects with the Plugin Suite

The practical advantage of Managed Cloud is not just that plugins are included. It is that every plugin works without the installation friction that delays adoption on self-hosted environments.

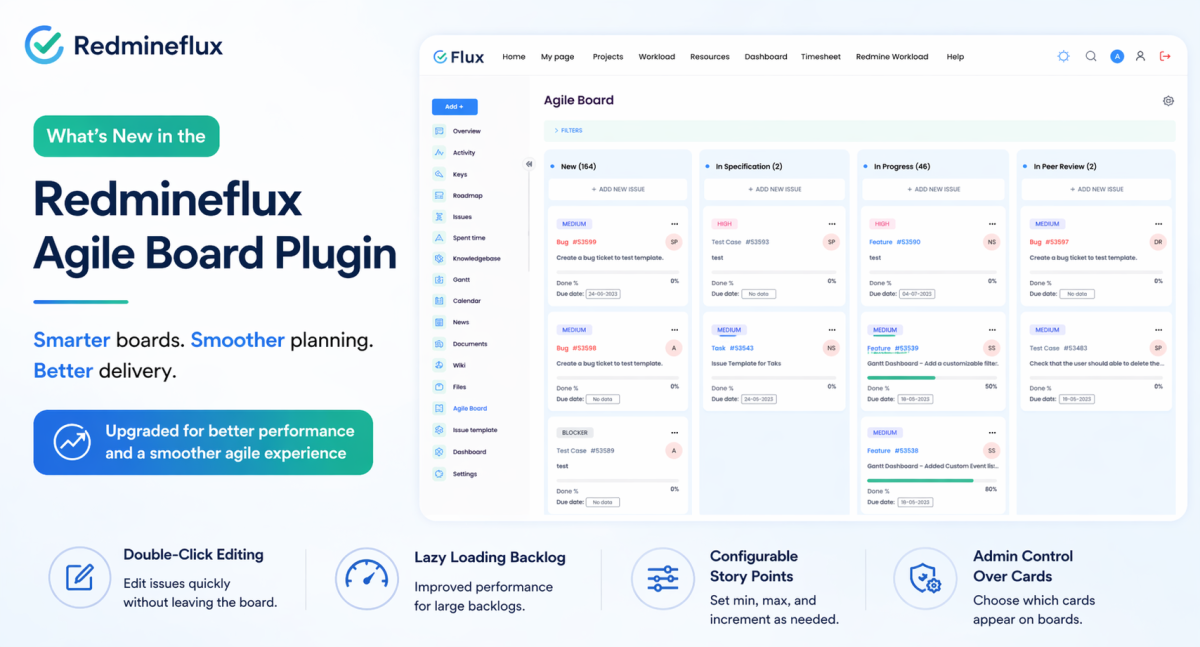
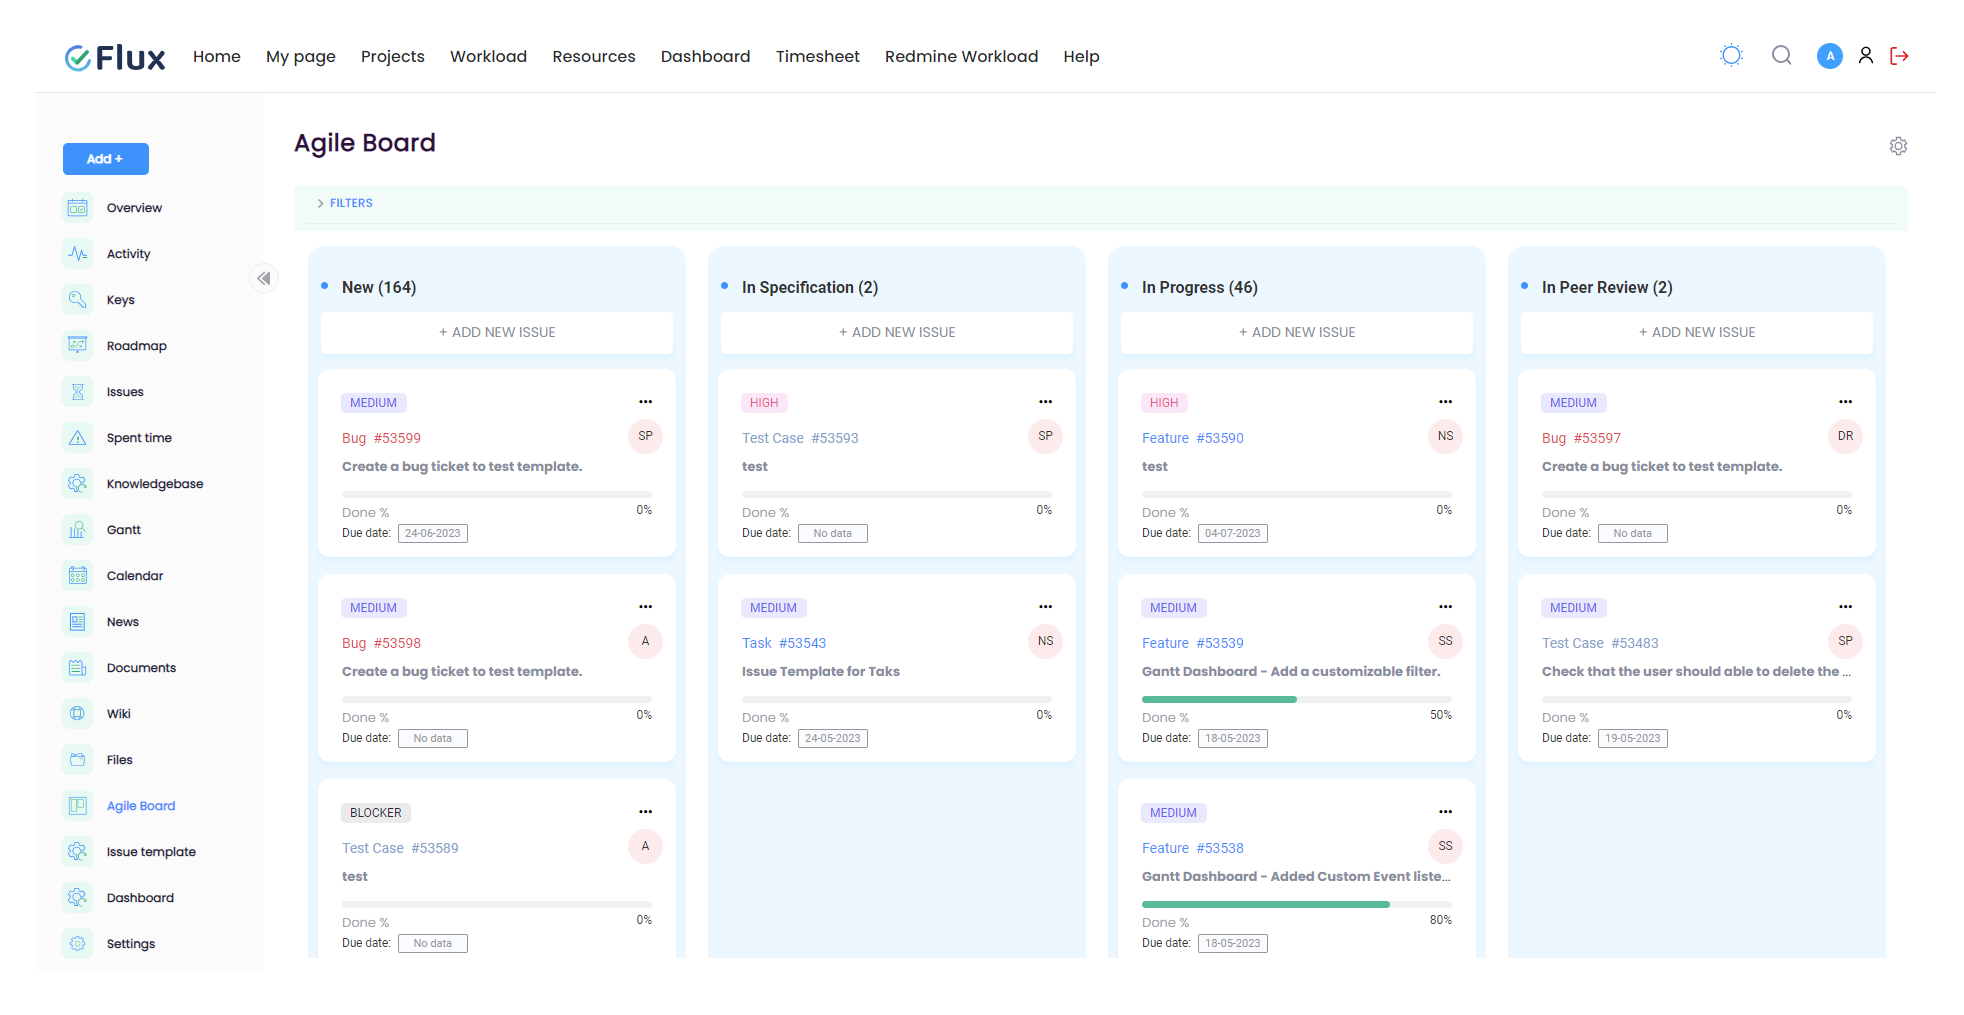
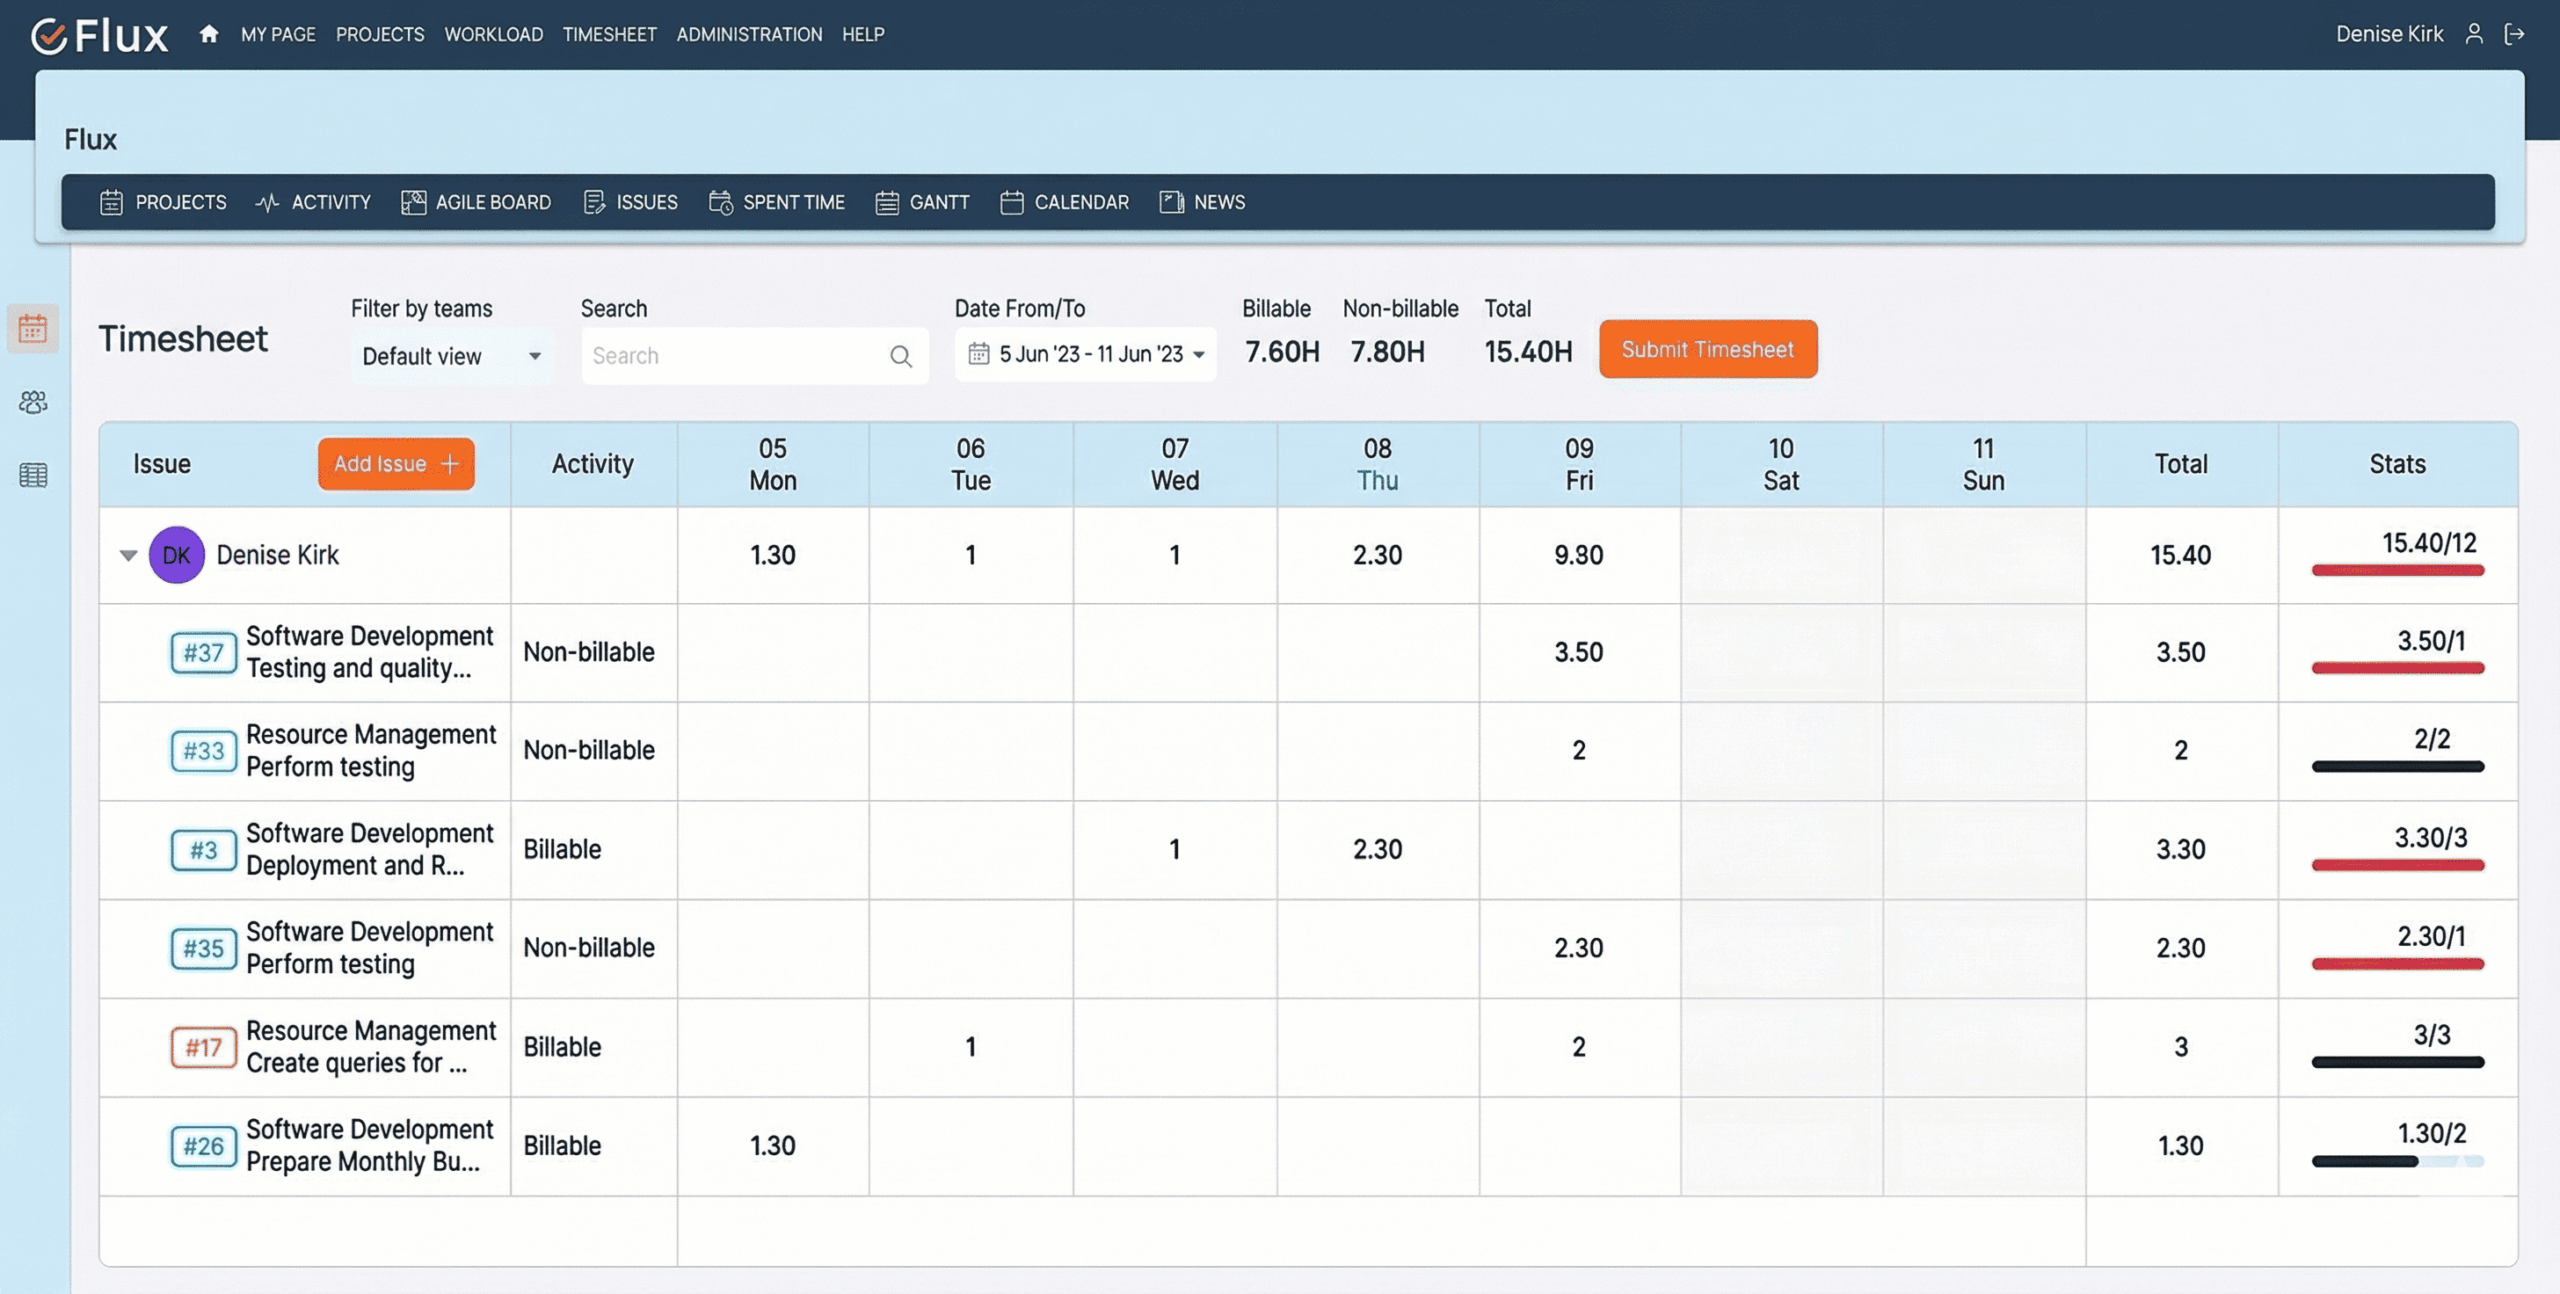
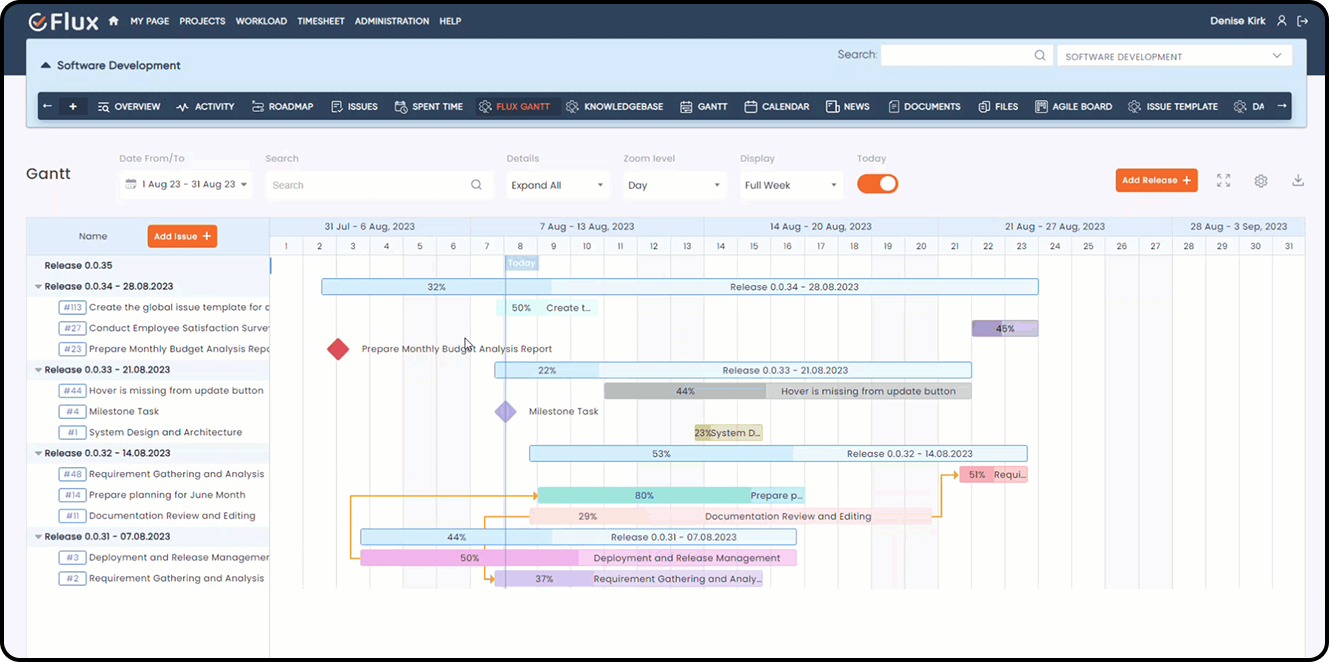
Teams that run self-hosted Redmine often delay plugin adoption because installation requires a maintenance window, compatibility checks, and someone technical enough to handle the process safely. On Managed Cloud, that barrier does not exist. The Agile Board Plugin is enabled from day one your team starts sprint planning immediately. The Gantt Chart Plugin is pre-configured your project managers start building timelines without waiting for a deployment. The Timesheet Plugin is ready for time tracking and approval workflows before your first project kicks off.

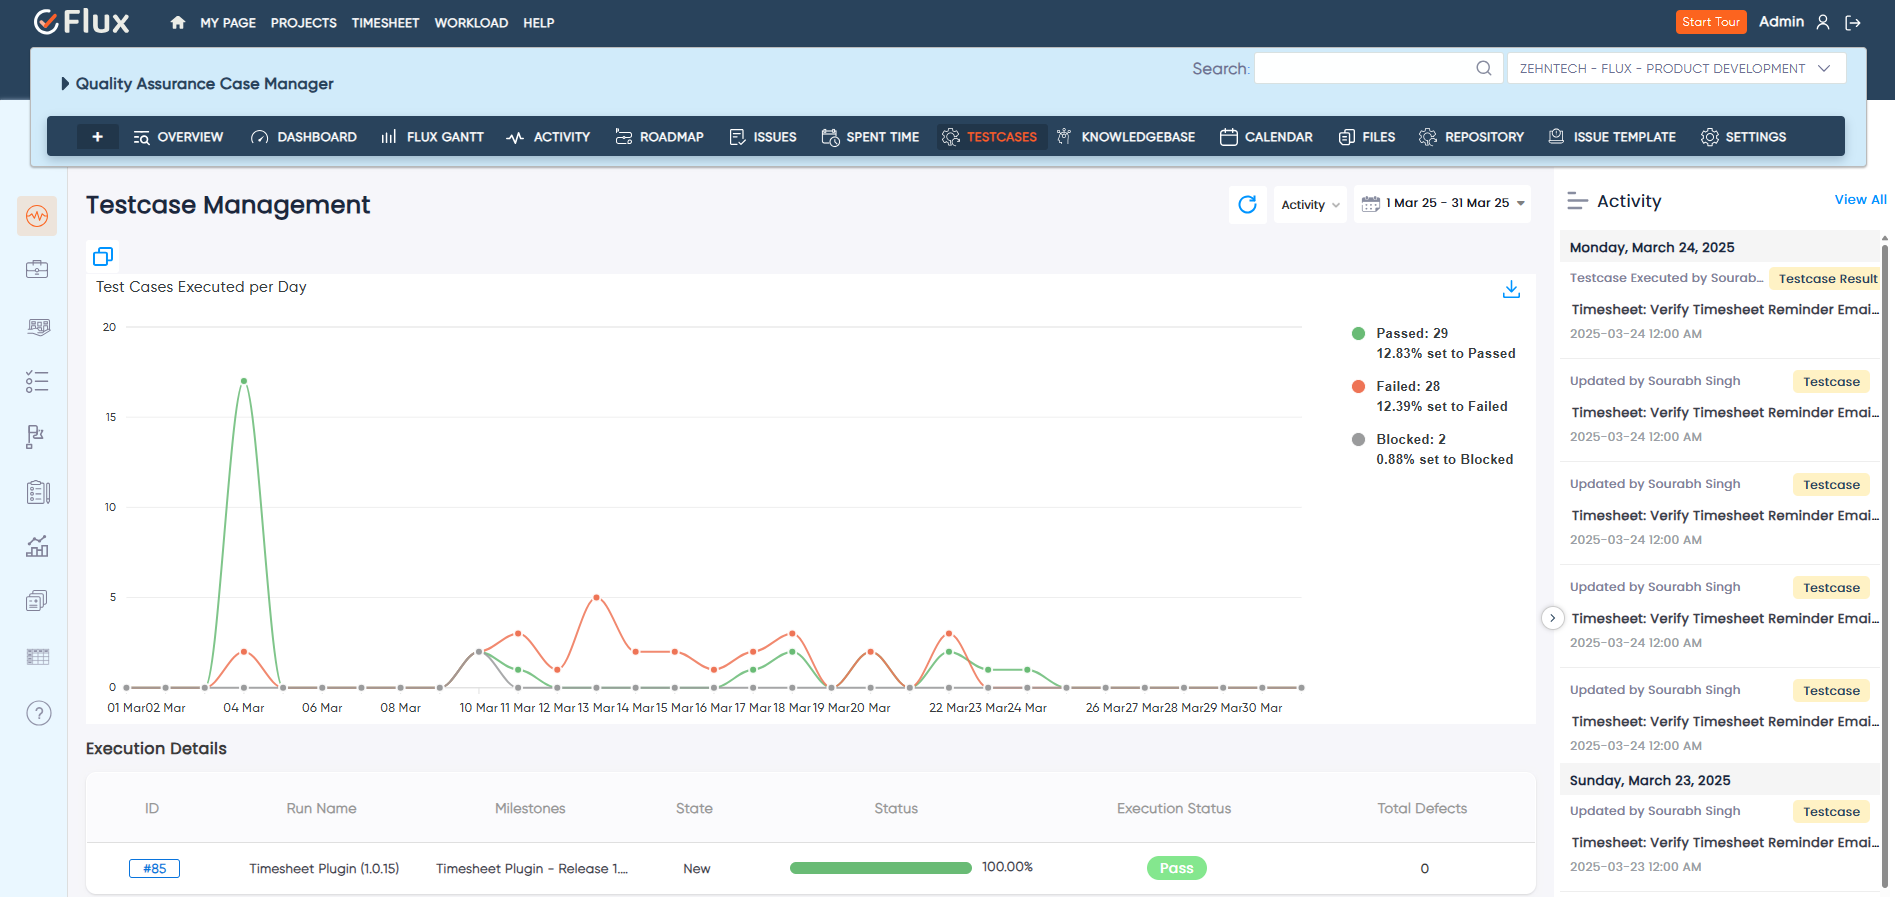
The same applies to Knowledge Base for documentation, Helpdesk for support tickets, CRM for client and contact management, and every other plugin in the suite. Managed Cloud makes the full plugin suite available on day one not after a sequence of installation projects that stretch across weeks.

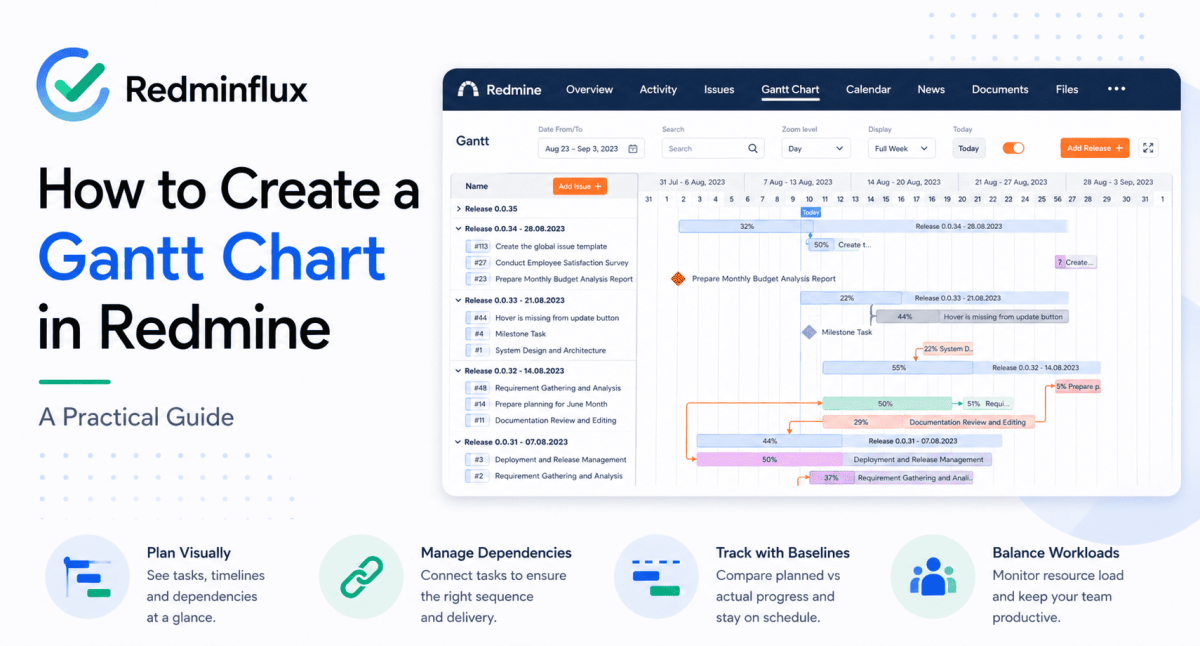
For teams looking to go deeper on specific workflows, the guides on how to track time in Redmine and how to create a Gantt chart in Redmine cover the practical setup steps for the tools your team will use most.

Common Questions

What is Redmine Managed Cloud?

Redmine Managed Cloud is a hosted Redmine deployment where the provider handles infrastructure, upgrades, backups, and plugin management on your behalf. Redmineflux Managed Cloud includes the full Redmineflux plugin suite pre-installed. Your team uses a complete Redmine environment without managing any servers.

Does Redmineflux Managed Cloud include all plugins?

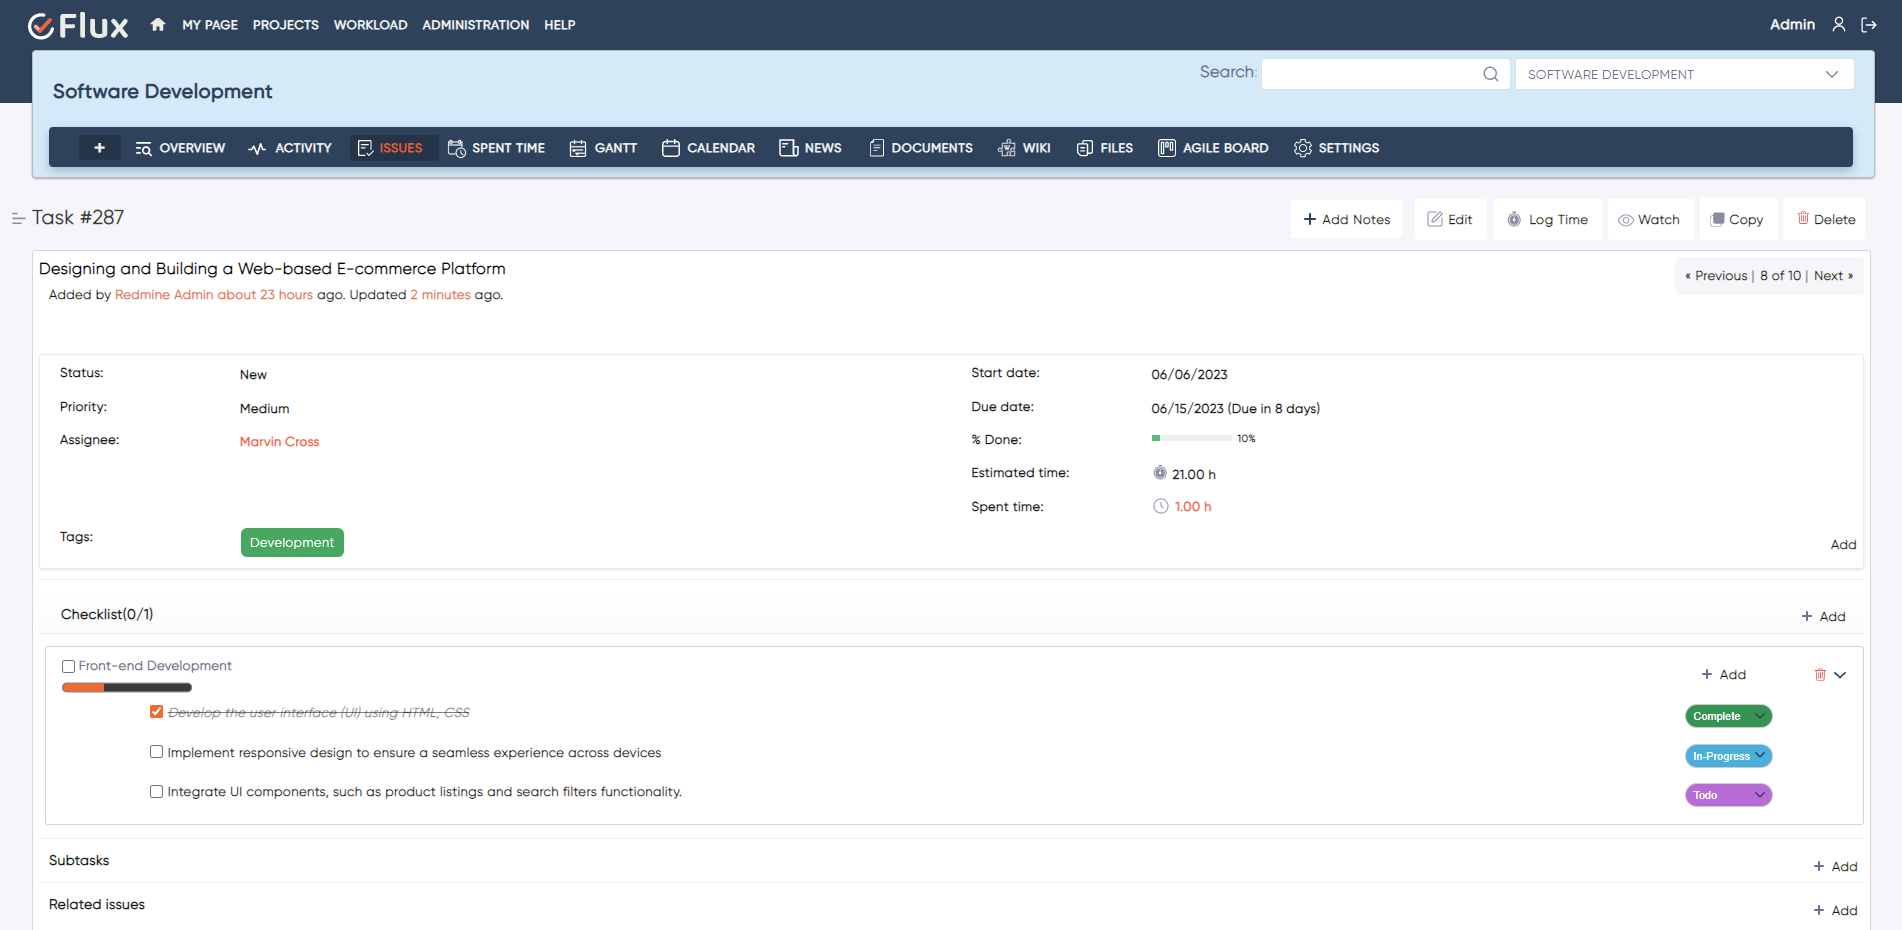
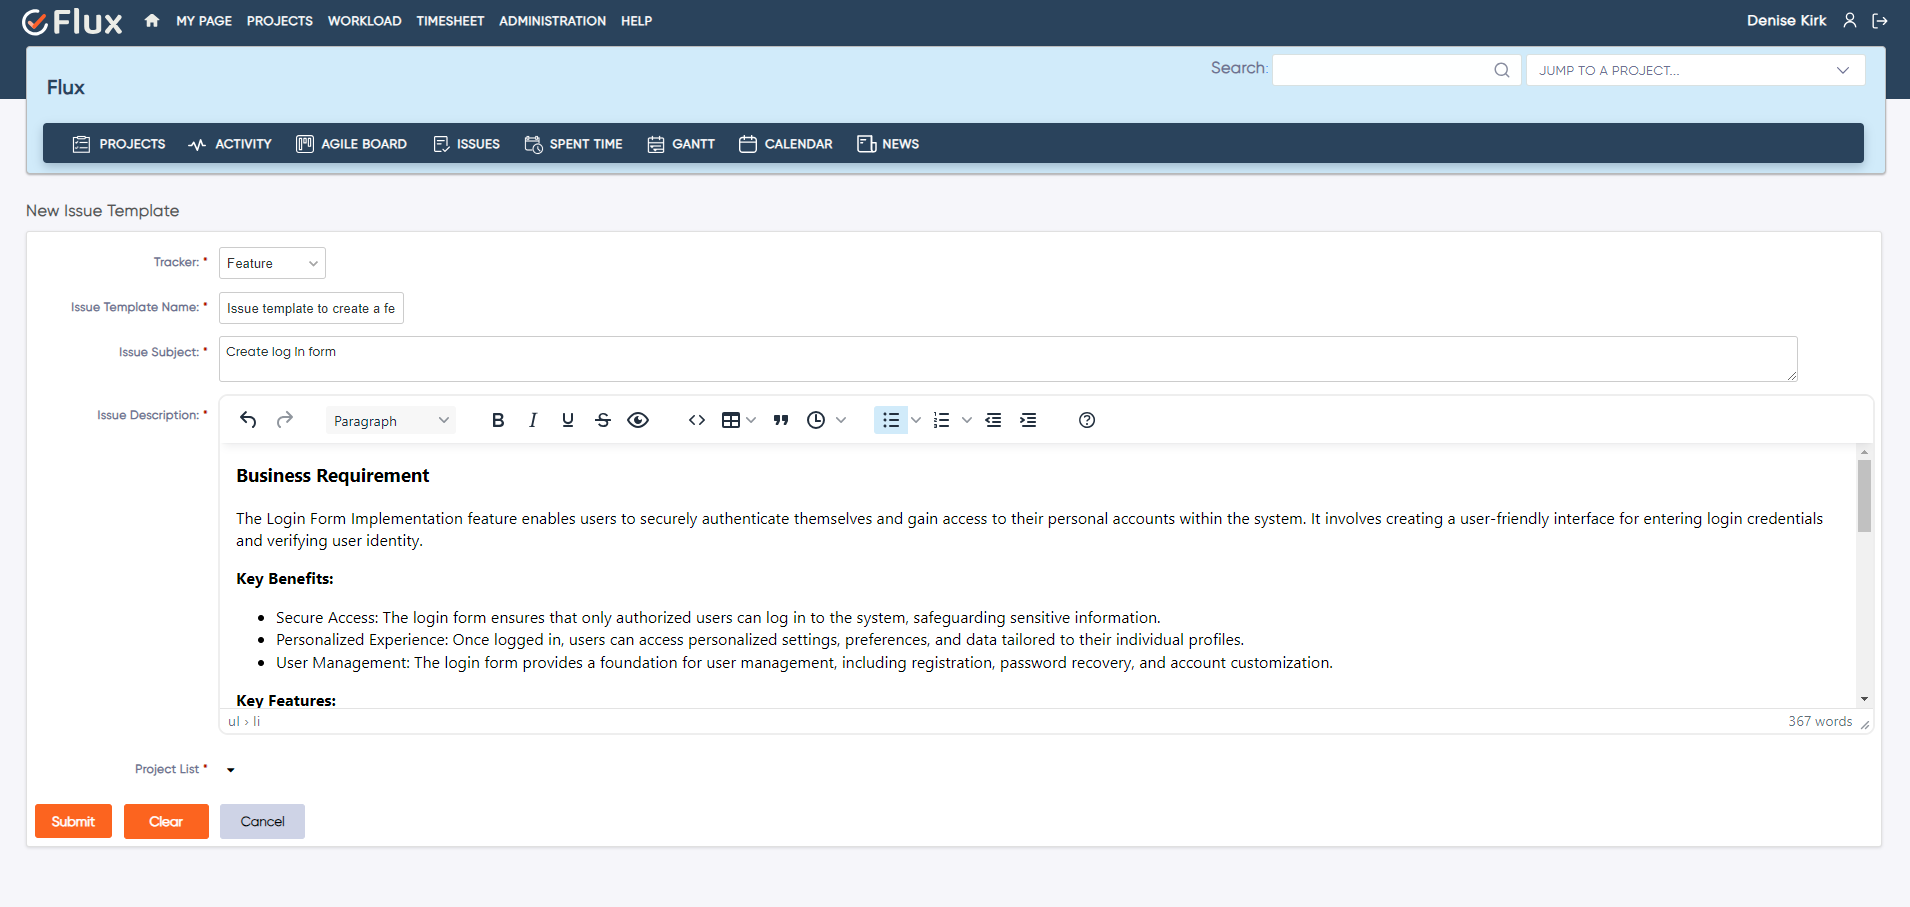
Yes. Every plugin in the Redmineflux suite comes pre-installed on Managed Cloud. That includes Agile Board, Gantt Chart, Timesheet, Workload, Custom Dashboard, Knowledge Base, Helpdesk, CRM, Issue Templates, Checklist, and more. No separate plugin licences or installation steps.

Can I migrate from self-hosted Redmine to Managed Cloud?

Yes. The Redmineflux team supports migrations from self-hosted Redmine to Managed Cloud. Your existing projects, issues, users, time entries, and attachments move to the new environment. Contact the Redmineflux team to discuss the migration process for your specific setup.

Who owns the data in Redmineflux Managed Cloud?

Your team owns your data. Redmineflux Managed Cloud gives each customer a dedicated environment not a shared multitenant system. You can export your data at any time. If you choose to move to self-hosted in the future, your data goes with you.

What happens when Redmine releases a new version?

The Redmineflux team handles the upgrade. They test plugin compatibility across the full suite, run the required schema migrations, and move your instance to the new Redmine version. Your team sees no planned downtime to manage and no compatibility failures to diagnose.

Is Managed Cloud more expensive than self-hosting?

The licence cost for Managed Cloud is higher than running Redmine on your own hardware. The full cost comparison depends on what you count. Self-hosted Redmine requires a server, IT time for setup, time for each upgrade cycle, and ongoing maintenance overhead. Managed Cloud replaces those costs with a predictable per-user monthly fee. For teams without a dedicated server admin, Managed Cloud is often the more cost-effective option when staff time enters the calculation.

Self-hosting Redmine gives your team full control. Managed Cloud gives your team full Redmine without the infrastructure work that delays upgrades, holds back plugin adoption, and quietly consumes IT bandwidth.

Explore Managed Cloud See what the Redmineflux Managed Cloud includes Get Free Demo See Redmine running with all plugins pre-installed View All Plugins Browse the full Redmineflux plugin suite

Categories
Informational

How to Create a Gantt Chart in Redmine — A Practical Guide

Redmine has a Gantt view built in. Most teams find it early, use it briefly, and then quietly stop.

The reason is always the same. The default view shows your issues as bars on a timeline. Start date on the left, due date on the right. You can filter by project, tracker, or assignee. You can print it. But you cannot drag bars to reschedule work, you cannot draw lines between issues to show dependencies, and you cannot compare today’s schedule against what you originally planned. When a project slips, the default Gantt has no way to show you how far it has moved.

For small projects with short timelines and a single team, that is often enough. For software releases with cross-team dependencies, client deliveries with fixed milestones, or IT portfolios where one overloaded developer can hold up three projects — the default Gantt runs out of road quickly.

This guide covers how to create a Gantt chart in Redmine using both the built-in view and the Redmineflux Gantt Chart Plugin, and when each approach is the right one.

What Redmine’s Built-In Gantt View Does

The short answer: Redmine’s built-in Gantt view displays issues on a timeline based on start and due dates. It is read-only, does not support dependencies or baselines, and does not let you reschedule work directly. For basic timeline visibility, it works. For active project planning, it requires the Redmineflux Gantt Chart Plugin to be useful.

To access the built-in view, open any Redmine project and click the Gantt tab in the project menu. Any issue with a start date and a due date appears as a bar on the timeline. You can filter by tracker, assignee, version, or priority to narrow the view.

That is genuinely useful when all you need is a quick visual of what is scheduled and when. A project manager checking whether the team’s work is spread across the month, or whether a set of issues is clustered too close to a release date, gets value from this view with no additional setup required.

The limitations become visible quickly when teams try to use it for active planning. There is no way to see which issues depend on other issues finishing first. There is no baseline to compare current progress against the original plan. There is no resource view to check whether the team is overloaded on specific dates. And there is no interactivity — you cannot move a bar and have Redmine reschedule the issue. Every date change has to be made manually inside each issue.

How to Create a More Complete Gantt Chart in Redmine

The Redmineflux Gantt Chart Plugin adds the planning layer that the built-in view is missing. Dependencies, baselines, milestones, resource loading, drag-and-drop rescheduling, and cross-project timelines — all working directly on top of your existing Redmine issues.

Here is how to set it up from scratch.

Step 1 — Install the plugin

Upload the plugin folder to Redmine/plugins/gantt_chart. Run bundle install to install required gems. Run the database migration for your environment:

RAILS_ENV=production bundle exec rails redmine:plugins:migrate

Restart Redmine. The plugin is now installed.

Step 2 — Enable Gantt Chart for your project

Go to Project → Settings → Modules tab. Check the Gantt Chart module and save. The project menu now shows a Gantt Chart tab alongside Issues, Agile Board, and other enabled modules.

Step 3 — Make sure your issues have dates

For any issue to appear on the Gantt chart, it needs a start date and a due date. You can set these on individual issues via the issue edit form. You can also assign dates directly by dragging on the Gantt canvas — click and drag on an empty row for an issue that has no dates yet, and the plugin creates the date range immediately.

If your team has been skipping start dates because the built-in view was not useful, this is the step where the habit needs to change. A Gantt chart without dates is an empty chart.

Step 4 — Add dependencies between issues

Open any issue and scroll to the Relations section. Add a “follows” relation — meaning this issue follows another issue and cannot start until the predecessor is complete. Save the issue.

Back on the Gantt chart, you will now see a connector line between the two issues. If the predecessor’s due date is later than the dependent issue’s start date, the schedule conflict is immediately visible on the chart. This is the moment where most teams realise how many implicit dependencies existed in their project that were never formally tracked.

Step 5 — Set a baseline

Open the Gantt Chart view and click Set Baseline. The plugin saves the current schedule — every issue’s start and end dates — as your reference plan.

From this point forward, the Gantt chart shows two bars for every issue: the baseline bar showing the original planned dates, and the current bar showing today’s dates. When an issue moves, the gap between the two bars makes the slippage immediately visible without any manual comparison.

Set a baseline at the start of each sprint, release, or project phase. It takes one click and gives you an honest record of how delivery tracked against the original commitment.

Step 6 — Add milestones

The Gantt Chart Plugin links milestones to Redmine versions. Go to Project → Settings → Versions → New Version. Give it a name and a target date. Save it.

Back on the Gantt chart, that version appears as a diamond marker on the timeline — visible alongside all the issues working toward it. This is the view you share with stakeholders or clients when they ask for a delivery timeline. It shows the target date, the issues scheduled before it, and how current progress sits relative to the milestone.

Step 7 — Review resource loading

The Gantt Chart Plugin shows team member workload on the timeline. Scroll to the resource section of the view to see which team members are assigned to work on which dates.

Before scheduling a new piece of work or pulling an issue forward on the timeline, check whether the assigned person has capacity on those dates. Most scheduling conflicts that surface mid-sprint were visible at planning time — they just had no tool to surface them.

What This Looks Like in a Real Project

Consider a software team planning a release. The release has four phases: design, development, QA, and deployment. Development cannot start until design is complete. QA cannot start until development is done. Deployment is blocked until QA sign-off.

Without dependencies on the Gantt, that sequence is implicit — everyone knows it, but nothing in the schedule reflects it. When design runs two days late, no one immediately updates the development start date. QA does not know their window has shifted. The release date stays fixed on the calendar while the schedule underneath it silently compresses.

With the Gantt Chart Plugin, you link those four phases as Finish-to-Start dependencies. When design slips two days, the dependent phases update on the chart automatically. The project manager sees the impact on the release date before anyone misses it. A conversation happens at replanning, not at the release date.

That is the practical difference between a timeline view and a planning tool.

Where the Gantt Chart Plugin Fits in the Wider Workflow

The Gantt chart works best when it connects to the rest of your Redmine workflow, not when teams use it in isolation.

Agile Board — daily work meets delivery timeline

If your team runs sprints on the Agile Board Plugin, those sprint issues appear automatically on the Gantt. Daily board work and delivery timeline planning stay in sync without any manual transfer. Use the board for day-to-day standups and the Gantt for release-level planning — both views draw from the same issues.

Timesheet Plugin — effort alongside schedule

Time entries logged through the Timesheet Plugin sit against the same issues the Gantt displays. Effort visibility and schedule visibility come from one place. If an issue takes longer than estimated, the logged hours show you exactly why the bar moved.

Workload Plugin — capacity before commitment

If resource loading is a recurring concern, the Workload Plugin gives the team a dedicated capacity view. Used alongside the Gantt, it means you plan delivery dates knowing who is actually available — rather than discovering overloads after you have already made commitments.

Common Questions

Does Redmine have a built-in Gantt chart?

Yes. Redmine includes a read-only Gantt view that displays issues on a timeline based on start and due dates. It supports basic filtering but does not allow dependencies, baselines, milestones, or drag-and-drop rescheduling. The Redmineflux Gantt Chart Plugin adds those capabilities on top of Redmine’s existing issue data.

How do I add dependencies between issues in Redmine?

Open an issue, scroll to the Relations section, and add a “follows” relation pointing to the predecessor issue. Once saved, the dependency appears as a connector line on the Gantt chart. Dependent issues update visually when predecessor dates change, making schedule impacts immediately visible.

What is a Gantt baseline in Redmine and how do I set one?

A baseline is a saved snapshot of your planned schedule at a specific point in time. To set one, open the Gantt Chart view and click Set Baseline. The current issue dates are saved as the reference plan. Future views show both baseline and current dates, making schedule slippage visible at a glance.

Can I view multiple Redmine projects on one Gantt chart?

Yes. The Redmineflux Gantt Chart Plugin includes a cross-project Gantt view. You select the projects to include and view all their issues on a single timeline. This is particularly useful for programme managers and IT directors overseeing several concurrent workstreams from one view.

Can I drag and drop issues to reschedule them on the Gantt?

Yes. The plugin supports drag-and-drop rescheduling directly on the Gantt canvas. Dragging an issue bar to a new position updates the issue’s start and due dates in Redmine on save. Dependent issues shift in line with the rescheduled predecessor.

Which Redmine versions does the Gantt Chart Plugin support?

Redmineflux tests and supports the plugin on Redmine 5.0.x, 5.1.x, and 6.0.x. Teams running Redmine 4.x should contact support before purchasing to confirm compatibility.

Redmine’s built-in Gantt view is a starting point — useful for visibility, limited for planning. The Redmineflux Gantt Chart Plugin turns it into an active planning tool where dependencies are tracked, you can measure slippage against a baseline, and resource conflicts surface before they affect delivery.

For a broader picture of how time tracking and issue setup connect to Gantt planning, the guides on how to track time in Redmine and how to set up issue tracking in Redmine cover the foundations that make the Gantt chart most useful.

Categories
Informational

How to Set Up Issue Tracking in Redmine — A Practical Guide from Redmineflux

At Redmineflux, we build plugins and managed Redmine environments for development teams. Issue tracking sits at the center of that work, it is where ownership, status, priority, and progress live.

Redmine is flexible by design. That flexibility is useful, but it also means a new instance can feel under-defined until the issue tracking model is properly configured.

This guide explains how to set up issue tracking in Redmine, which settings matter most, and where Redmineflux plugins add structure when core Redmine is no longer enough.

What Redmine Issue Tracking Actually Controls

Before changing settings, it helps to understand what Redmine treats as an issue. In Redmine, an issue can represent a bug, feature, support request, internal task, test item, or almost any other work object tied to a project.

That flexibility comes from a few core building blocks:

  • trackers define the type of work, such as bug, feature, support, or task
  • statuses define where the work currently sits in its lifecycle
  • workflow rules define which status transitions are allowed for each role
  • custom fields capture the extra data your team needs on creation or handoff
  • roles and permissions determine who can create, edit, assign, and close issues

Answer capsule: A good Redmine issue tracking setup combines trackers, statuses, workflows, permissions, and custom fields into one consistent model. The goal is not to create more settings. The goal is to make issue creation clearer, handoffs cleaner, and reporting more reliable across the whole project lifecycle.

If these pieces are not aligned, teams usually experience the same problems: vague tickets, inconsistent states, unclear ownership, and reporting that cannot be trusted.

Start with Trackers, Not with Statuses

One of the most common setup mistakes is trying to build the whole process around statuses first. In practice, trackers should come first because they define what kind of work the issue represents.

For example:

  • bug may need severity, reproduction steps, and QA verification
  • feature may need acceptance criteria, story points, and release planning
  • support ticket may need requester details, SLA rules, and response ownership
  • an internal task may need a lighter workflow with fewer required fields

If all of those are forced into one generic issue type, the result is either too much friction or too little structure.

A Practical Tracker Model for Most Teams

For many software and IT teams, a clean starting model looks like this:

  • Bug
  • Feature
  • Task
  • Support
  • Change Request

This is usually enough to separate work meaningfully without creating a tracker list so large that no one uses it consistently.

If your team handles repetitive intake, the Issue Template Plugin is often the next useful layer because it standardizes issue creation for each tracker and reduces missing information at the source.

Define Statuses Around Real Handoffs

Statuses should reflect actual workflow states, not aspirational labels. The cleanest Redmine setups usually use a small set of states that map directly to real team behavior.

A practical example:

  • New
  • In Progress
  • In Review
  • QA
  • Resolved
  • Closed

This works because each state signals a meaningful handoff or decision point. It also keeps reporting readable. If the system contains fifteen statuses with overlapping meanings, users stop trusting the board and managers stop trusting the reports.

How to Think About Status Design

Use statuses for workflow milestones, not for every nuance of work.

Good status questions:

  • has someone started this work
  • is it waiting on review
  • is it in testing
  • is it done but not yet formally closed

Poor status questions:

  • is this blocked because of one temporary dependency
  • is the user having a slightly different kind of review
  • does one team prefer a special naming convention

Those cases are usually better handled through notes, tags, or custom fields rather than new statuses.

For agile teams, the Agile Board Plugin becomes useful here because it turns those statuses into a clearer visual flow for Kanban and Scrum execution.

Configure Workflow Rules by Role

This is where Redmine becomes much more powerful than a simple ticket list. Workflow rules let you decide which roles can move which trackers between which statuses.

That matters because a good workflow protects process quality without forcing everyone into the same permissions model.

Examples:

  • Developers can move Bugs from New to In Progress
  • QA can move Bugs from Resolved to QA or back to In Progress
  • Project Managers can close Features after review
  • Support agents can create and update Support issues without changing development-only fields

This is what makes Redmine suitable for mixed teams. You are not just tracking issues. You are controlling how work moves between people and functions.

Keep Workflows Different Only Where It Matters

Not every tracker needs a completely separate workflow. Use separate workflows when the work type genuinely changes the handoff logic. If the process is basically the same, reuse the same structure and keep administration lighter.

A good rule is this: separate workflows should reduce confusion, not create configuration overhead.

Use Custom Fields to Improve Ticket Quality

Once trackers and statuses are clear, custom fields become the next quality lever. This is where you capture the information your team repeatedly asks for during clarification.

Useful examples:

  • Severity
  • Environment
  • Reproduction Steps
  • Acceptance Criteria
  • Client Name
  • Billable / Non-Billable
  • QA Owner
  • Release Version

The best custom fields answer questions that otherwise appear in comments after the issue has already been created.

This improves three things at once:

  • issue quality at creation
  • handoff quality between teams
  • filter and reporting quality later

If your team still closes work with missing steps, the Checklist Plugin is a strong companion because it helps enforce definition-of-done discipline at the issue level.

Make Issue Creation Easier, Not Heavier

Teams often over-correct once they discover Redmine’s flexibility. They add too many required fields, too many statuses, and too many workflow branches. The result is a ticket form nobody wants to use.

The goal of Redmine issue tracking setup is not maximum configuration. It is minimum ambiguity.

A strong setup usually has these traits:

  • each tracker has a clear purpose
  • each status means something distinct
  • required fields are limited to what improves routing or execution
  • permissions match real team responsibilities
  • issue creation is fast enough that users do not avoid it

If your issue intake is repetitive and prone to omissions, templates usually work better than more admin rules. That is why the Issue Template Plugin can improve quality without making the issue form feel heavier.

Set Up Reporting Around the Workflow You Actually Use

Redmine reporting is only useful when the workflow underneath it is consistent. Once your tracker and status design is stable, you can filter and report by:

  • tracker
  • assignee
  • priority
  • version
  • status
  • project
  • custom field

That gives project managers a usable operational view instead of a flat ticket dump.

If your team also needs time visibility, connect this setup to the existing How to Track Time in Redmine guide and the Timesheet Plugin so execution effort and issue flow stay in one system.

If capacity planning is becoming the next bottleneck, this setup pairs naturally with How to Manage Workload in Redmine and the Workload Plugin.

For leadership reporting, the Custom Dashboard Plugin adds a stronger visual analytics layer on top of issue and project data.

Where Standard Redmine Stops — and Where Redmineflux Fits

Core Redmine is very good at flexible issue tracking. It gives you:

  • trackers
  • statuses
  • workflows
  • custom fields
  • roles and permissions
  • issue lists
  • basic time tracking
  • Gantt and roadmap views

For many teams, that is enough to start.

The gaps appear when teams want:

  • visual agile execution
  • standardized issue creation
  • definition-of-done enforcement
  • stronger documentation linked to work
  • support workflow inside the same system
  • better executive dashboards

That is where Redmineflux plugins move Redmine from a capable tracker into a more complete operating system for delivery.

Useful next layers include:

  • Agile Board Plugin for Scrum and Kanban execution
  • Issue Template Plugin for standardized intake
  • Checklist Plugin for process enforcement
  • Knowledge Base Plugin for linked documentation and SOPs
  • Helpdesk Plugin for customer support issue flow inside Redmine

A Practical Redmine Issue Tracking Setup for a Growing Team

If you want a simple starting point, this is a strong baseline:

Trackers

  • Bug
  • Feature
  • Task
  • Support

Statuses

  • New
  • In Progress
  • In Review
  • QA
  • Resolved
  • Closed

Required Fields

  • Priority
  • Assignee
  • Start Date
  • Due Date where relevant
  • One or two tracker-specific custom fields

Workflow Principles

  • developers move active engineering work
  • QA controls test and verification statuses
  • project managers close work where business confirmation matters
  • support roles stay inside support-specific transitions

This keeps the system light enough to adopt but structured enough to scale.

Common Questions About Redmine Issue Tracking

1. How do I set up issue tracking in Redmine?

Start by defining your trackers, then create a small set of meaningful statuses, configure workflow transitions by role, and add only the custom fields your team actually needs. A good setup makes issue creation easier and issue movement more consistent across the project lifecycle.

2. What is the difference between trackers and statuses in Redmine?

Trackers define what kind of work an issue represents, such as Bug or Feature. Statuses define where that issue is in its lifecycle, such as New, In Progress, or Closed. Trackers classify work. Statuses show workflow progress.

3. How many statuses should I use in Redmine?

Most teams should start with a small set of workflow states that map to real handoffs. Too many statuses make boards harder to read and reports less reliable. If a status does not represent a meaningful change in ownership or progress, it usually does not need to exist.

4. Can Redmine support different workflows for different issue types?

Yes. Redmine lets you configure workflows by tracker and by role. That means Bugs, Features, Support issues, and Tasks can each follow different transition rules while still living inside the same Redmine environment.

5. Which Redmine plugins improve issue tracking the most?

The most useful additions depend on the gap you are solving. The Agile Board Plugin improves visual workflow execution, the Issue Template Plugin improves intake quality, the Checklist Plugin improves completion discipline, and the Helpdesk Plugin extends Redmine for support-driven issue flow.

Redmine becomes much easier to manage once issue tracking is treated as a system instead of a list of tickets. Clear trackers, meaningful statuses, practical workflows, and a small number of useful custom fields create the foundation. That is the perspective behind the Redmineflux website as well: help teams get more out of Redmine first, then add the right plugin layer when they need stronger structure without forcing a tool migration.

Redmine becomes much easier to manage once issue tracking is treated as a system instead of a list of tickets.

Clear trackers, meaningful statuses, practical workflows, and a small number of useful custom fields create the foundation.

Build a Redmine setup your team can actually rely on

That is the perspective behind Redmineflux: help teams get more out of Redmine first, then add the right structure when they need it.

Categories
Informational

What’s New in the Redmineflux Agile Board Plugin

Product upgrades are easy to describe badly.

Most upgrade posts turn into feature dumps. They read like release notes, sales copy, or a product page wearing a blog title. That is usually not very helpful if you are an actual user trying to answer a simpler question: what changed, and will it make day-to-day work better?

That is the better way to look at the latest Redmineflux Agile Board Plugin upgrade.

The new version is not just adding extra options to an already busy plugin. It is a more thoughtful rebuild of the core board experience. The changes are most noticeable in the areas teams touch every day: how work is organized, how backlog planning behaves at scale, how editing happens from the board, and how admins control what appears across the instance.

If you already use the plugin, the upgrade feels less like a cosmetic refresh and more like a maturity step.

For anyone specifically searching for Redmine Agile Board new features, this is the short version: the Redmineflux Agile Board update is less about adding noise and more about making the plugin easier to run in real-world Kanban, Scrum, and sprint planning workflows.

The Old Version Was Useful, but It Had Started to Show Its Age

The earlier version of the Agile Board Plugin was already a solid extension for Redmine. It gave teams Kanban and Scrum boards, sprint support, Story Points, WIP limits, swimlanes, custom saved boards, and cross-project visibility through the Global Agile Board.

That is why this upgrade matters. It is not trying to rescue a weak product. It is improving a product that already solved a real problem.

Still, as teams grow, the pressure points become clearer. A backlog that works for a small project can feel heavy for a large one. A board that looks flexible at first can become cluttered when several teams use it differently. Editing directly on cards may sound efficient, but it is not always the cleanest interaction model in practice.

This upgrade seems to come from that exact kind of real usage pressure.

That is important context because a Redmine Kanban Scrum plugin is rarely judged on features alone. Teams judge it on whether daily work feels cleaner, whether sprint planning stays usable under pressure, and whether project managers can understand what is happening without opening five different views.

The Biggest Shift Is Structural, Not Cosmetic

The most important improvement is that the plugin now feels more clearly organized around three different working contexts:

  • the Project Agile Board for day-to-day work inside one project
  • the Global Agile Board for cross-project visibility
  • the Backlog for sprint and version planning

These areas existed before, but they now feel more intentional. That may sound like a small product-design point, but it changes how quickly users understand where to go and what each view is for.

That kind of clarity is what makes software feel easier, even when the total number of features does not change dramatically.

For teams using Redmine across multiple workstreams, this may be the most valuable part of the Redmine Agile Board Plugin upgrade. Better structure usually leads to better adoption.

Editing from the Board Feels More Deliberate Now

One of the more interesting changes is the move away from inline card editing toward double-click modal editing.

On paper, inline editing often sounds faster. In reality, it can make boards feel messy, especially when teams are moving quickly and many people are working in the same space. The new approach feels more controlled. You still edit without leaving the board, but the interaction is more focused and less visually noisy.

This is a good example of the upgrade choosing usability over novelty.

It also makes the plugin feel less like a collection of interactions and more like a system with a clear editing pattern, which matters when boards become central to day-to-day delivery.

The Backlog Improvement May Matter More Than It First Appears

Lazy loading in the Backlog is probably one of the most practical changes in the entire update.

It is not flashy. It is not the kind of feature people put at the top of a marketing banner. But for teams planning across large numbers of issues, it directly affects how usable the plugin feels during real planning sessions.

When backlog views slow down, sprint planning gets dragged down with them. People wait, scroll less confidently, and start working around the tool instead of through it. By improving how large backlogs load, the plugin is addressing one of those friction points that quietly shapes the whole experience.

If you are evaluating this as a Redmine sprint planning plugin update, this is one of the strongest reasons to care. Performance improvements in backlog planning have more operational value than many headline features.

Admin Control Is Stronger and Cleaner

Another meaningful shift is how Story Points are handled.

In the upgraded version, Story Points are disabled by default and managed at the plugin configuration level. That is a smart move. Not every team estimates the same way, and not every Redmine instance should expose the same planning fields to everyone by default.

This kind of control matters more than it first seems. A plugin becomes easier to adopt when teams can hide what they do not use and standardize what they do use. Instead of forcing one planning style across the board, the upgrade makes the plugin feel more governable.

The same applies to tracker and priority icon customization. It is a visual refinement, but it also signals that the plugin is moving toward a more deliberate admin-managed experience rather than a one-size-fits-all board.

That makes the upgraded plugin easier to standardize across teams, which is often where Redmine instances become difficult to govern.

The Upgrade Also Shows More Awareness of Multi-Team Reality

Some of the smaller changes say a lot about who this version is really for.

Saved boards now include better visibility and sharing control. Sprint setup includes a Sharing field. The Global Agile Board shows project context directly on the card. None of these changes are dramatic on their own, but together they suggest a plugin that is thinking more carefully about larger, messier Redmine environments.

That matters because agile tools tend to feel fine when one team uses them in one predictable way. The real test comes when several teams share projects, managers need cross-project visibility, and different roles need different board views.

This upgrade appears more aware of that reality than the earlier version.

That is also why the current Redmineflux Agile Board update feels more practical than flashy. It is solving coordination problems that appear only after real team growth.

What These Changes Mean in Practice

The easiest way to judge an upgrade is not by counting features. It is by asking what becomes easier after the upgrade than before.

In this case, the practical gains look like this:

  • teams can separate execution, planning, and cross-project review more clearly
  • backlog planning remains more usable when issue volume grows
  • board editing feels more controlled and less messy
  • admins can decide whether Story Points belong in the workflow at all
  • managers get better context on cross-project boards without extra clicks
  • different teams can maintain different saved-board views with less confusion

That is what makes the article more than a release summary. The real value is not that the plugin changed. The real value is that the working experience likely improves in several small but compounding ways.

A Few Things Are Worth Verifying Before Upgrading

One thing I would not ignore: some features documented in the previous version are not clearly mentioned in the newer material.

The two that stand out are:

  • time logging directly from board cards
  • watcher assignment from the board

That does not automatically mean those capabilities are gone, but if a team depends on them, it would be wise to verify current behavior before upgrading in production.

For a blog post, this kind of note is useful because it adds honesty. It helps the article feel like guidance rather than promotion.

If you are planning to test the Redmine Agile Board Plugin upgrade in a staging environment first, these are the areas worth checking:

  • existing sprint data after migration
  • saved board visibility and sharing behavior
  • Story Point settings and allowed values
  • Global Agile Board project labels
  • backlog performance on large issue sets
  • any workflow that depended on board-level time logging or watcher assignment

So, Does the Upgrade Actually Feel Better?

Yes, that is the main impression.

The plugin now feels less like a collection of agile features layered onto Redmine and more like a product that has learned from actual use. The workflow separation is clearer. Board interactions are more controlled. Backlog performance is better thought through. Admin settings are more intentional. Cross-project work gets a little less confusing.

None of that sounds dramatic in isolation. Together, it is what makes the upgrade feel more mature.

That is really the story here. Not “ten new things were added,” but “the product has grown up.”

For searchers comparing Redmine Agile Board new features across plugins or versions, that maturity point matters. A tool becomes more valuable when it reduces friction, not when it simply adds surface area.

Should Existing Users Upgrade?

If your team is already comfortable on the older version and your projects are small, the upgrade may feel incremental at first.

If your team works with larger backlogs, multiple project streams, different board views for different roles, or more formal sprint planning, the value is easier to see. In those cases, the upgrade appears to improve the exact areas that become painful as usage grows.

So the practical answer is:

  • upgrade sooner if backlog scale and board clarity are current pain points
  • review more carefully if your workflow depends on features that are not clearly documented in the new version
  • treat this as a workflow-quality upgrade, not just a feature upgrade

Final Thought

If I were reading this as a buyer or existing user, that would be the takeaway I would care about most: the new Agile Board Plugin seems better aligned with how teams actually work inside Redmine once projects become more serious, more shared, and more complex.

That makes this a good upgrade story for a blog, because the value is not just in listing features. It is in explaining what kind of working experience those features create.

If needed, the full knowledgebase for the current plugin is still available at Redmineflux but this post should now read first as an article, not as a product page.

FAQ

1. Does Redmine support workload management by default?

Redmine supports basic task assignment and time estimation, but it does not provide a complete workload management layer. Teams can assign work, but they cannot clearly compare assigned hours against actual team capacity across projects.

2. Why is Redmine workload management challenging for growing teams?

As teams grow, resources are shared across multiple projects, and simple task assignment is no longer enough. Without visibility into real capacity, workloads become unbalanced, leading to delays, overload, and unrealistic planning.

3. Can I track workload per user per day in Redmine?

Standard Redmine does not provide a clear view of workload per user per day. Teams often rely on manual tracking or spreadsheets to estimate availability and workload distribution.

4. How do teams usually manage workload in Redmine?

Most teams start using spreadsheets or manual tracking methods to understand workload and capacity. This happens because Redmine is better at tracking tasks than balancing workload across users and projects.

5. What is the difference between task assignment and workload management?

Task assignment shows who is responsible for work, while workload management shows whether that work is realistically achievable based on available time and capacity. The difference becomes critical as teams scale.

Categories
Informational

Redmine Workload Management: The Gap Between Assigned Work and Real Capacity

Redmine can tell you who owns the work.

That sounds useful, and it is. But it is not the same thing as knowing whether the team actually has the capacity to deliver what has been assigned.

That gap is where workload management becomes a real issue.

Most Redmine teams do not feel it immediately. At first, issue assignment feels close enough to planning. A task has an assignee, an estimate, and a due date. The board moves, the list updates, and everything appears organized.

Then the planning gets harder.

One engineer is shared across three projects. Another is on leave next week. A sprint looks reasonable on paper, but half the work is concentrated on two overloaded people. Suddenly the problem is no longer whether work has been assigned. The problem is whether the assignment reflects reality.

That is the point where Redmine workload management becomes more than a nice-to-have.

At Redmineflux, this is one of the most common planning gaps we see in growing Redmine environments. Teams are already disciplined about issue tracking, but they still lack a clear way to compare assigned work against actual capacity before commitments are made.

Why Issue Assignment Is Not Workload Planning

This is the mistake many teams make without realizing it.

They assume that if work is visible and assigned, then capacity is also visible. But those are two different things.

An assigned issue does not tell you:

  • whether the person already has a full week
  • whether they are splitting time across multiple projects
  • whether upcoming leave changes the real schedule
  • whether estimated hours are stacking up beyond available time
  • whether the sprint is balanced across the team

That is why basic assignment is not the same as Redmine resource planning. One tells you who owns the task. The other tells you whether the plan is believable.

What Standard Redmine Actually Does Well

It is worth being fair here. Redmine already gives teams the basics of coordination.

You can create issues, assign owners, set due dates, estimate effort, track statuses, and review work through lists, calendars, and Gantt views. That is more than enough for teams that mainly need project structure and task visibility.

For lighter planning needs, standard Redmine can support:

  • issue assignment
  • estimated hours
  • date-based planning
  • status tracking
  • filtered project review

That is why so many teams start with it comfortably.

The trouble begins when planning stops being about visibility and starts being about capacity.

That distinction matters on the Redmineflux website because many teams evaluating plugins are not trying to replace Redmine. They are trying to keep Redmine as the core system while adding the planning layer it does not provide cleanly by default.

Where Redmine Workload Management Starts to Break Down

The breaking point usually arrives quietly.

A manager starts maintaining a spreadsheet because it is easier to see everyone’s week there. A lead asks in a meeting whether someone is actually free before assigning a task. PMOs begin doing manual cross-checks because multiple projects are sharing the same people. Delivery plans start looking fine in Redmine but slipping in real life.

That is usually the signal.

The issue is not that Redmine has no planning data. The issue is that it does not give most teams a proper workload planning layer out of the box. It can show work, but it does not always show pressure clearly enough.

And pressure is the thing teams actually need to see.

What Redmine Workload Management Really Means

At a practical level, Redmine workload management is not just about reviewing issues. It is about comparing planned work against actual availability before commitments are made.

A useful workload process answers questions like:

  • who is overloaded this week
  • who still has room
  • which people are stretched across multiple workstreams
  • whether the next sprint is realistic
  • where work should be rebalanced before delivery slips

That is why Redmine capacity planning matters. It moves the team from tracking tasks to judging whether the current plan is operationally realistic.

What Growing Teams Usually Need Next

Once teams reach that stage, they usually stop asking for better issue filters and start asking for clearer workload visibility.

  • They want to see workload per user per day, not just a list of assigned tasks.
  • They want to see assigned hours against available hours, not just estimated hours in isolation.
  • They want to factor in leave, holidays, and working-hour rules.
  • They want to rebalance work before problems show up in standups, missed deadlines, or burnout.

That is where the conversation often shifts from basic Redmine assignment to a more complete workload planning workflow.

What Better Workload Planning Feels Like

The best way to describe better planning is that it feels less hopeful.

  • Instead of assuming the sprint is realistic because every issue has an assignee, managers can actually see where the pressure sits.
  • Instead of discovering cross-project conflicts after commitments are made, they can spot them earlier.
  • Instead of asking who is free, they can ask whether the plan is balanced.
  • Instead of using spreadsheets as the real planning layer and Redmine as the record afterward, they can keep planning closer to where the work already lives.

That is what better Redmine workload management changes. It does not just make the plan more visible. It makes the plan more believable.

Where a Redmine Workload Plugin Fits

This is the point where a Redmine workload plugin starts to make sense.

The Redmineflux Workload Plugin adds the missing planning layer on top of Redmine’s existing issue structure. It is not replacing Redmine. It is making the existing plan easier to evaluate against real team capacity.

For teams dealing with Redmine capacity planning across multiple people and projects, that usually means:

  • daily, weekly, and monthly workload visibility
  • clearer Redmine workload per user per day
  • assigned-hours versus available-hours comparison
  • support for leave, holidays, and working-time assumptions
  • better multi-project resource planning
  • easier rebalancing when one part of the team is overloaded

That is the practical difference between simply seeing work and actually planning it well.

For Redmineflux, that is the real role of the plugin layer. It should make Redmine more operationally complete without pushing teams into disconnected spreadsheets or separate planning tools.

A Simple Test: Have You Outgrown Native Redmine for Planning?

If any of these sound familiar, you are probably already feeling the limit:

  • managers rely on spreadsheets to see team capacity
  • one person’s assignments are spread across several projects and hard to review together
  • sprint planning feels optimistic until execution starts
  • overload shows up after commitment, not before
  • leave and working hours are not reflected clearly in planning
  • tasks are assigned, but nobody is sure whether the team can realistically absorb them

When those patterns show up, the problem is not that Redmine is failing at issue tracking. It is that issue tracking alone is no longer enough.

Final Thought: Moving Beyond Task Lists

Redmine is very good at organizing work. That is one reason teams continue to rely on it.

But organizing work and planning capacity are not the same thing. Once teams grow, share resources across projects, or need more realistic sprint commitments, the difference becomes hard to ignore.

Why Visibility Matters for Delivery

That is why Redmine workload management becomes such an important topic. It is not because teams need more tasks in the system, but because they need clearer visibility into whether the current workload actually fits the people available to do it.

And that is exactly when a structured Redmine workload plugin becomes less of an upgrade and more of a practical next step.

Plan delivery with real workload data inside Redmine

Frequently Asked Questions

1. Does Redmine have workload management by default?

Not in a fully developed planning sense. Redmine lets teams assign work, estimate hours, and review issues, but it does not give most teams a true workload planning layer showing assigned work against actual available capacity across users and projects.

2. Can I see workload per user per day in Redmine?

Not clearly in standard Redmine. This is one of the most common reasons teams start looking at a Redmine workload plugin. They need a better way to see workload per user per day instead of relying on issue lists, estimates, and manual reviews.

3. Why do teams still use spreadsheets for Redmine resource planning?

Usually because native Redmine is better at tracking work than balancing it. Teams fall back to spreadsheets when they need a quick view of who is overloaded, who has room, and how assignments look across multiple projects at the same time.

4. How does the Redmineflux Workload Plugin improve Redmine workload management?

The Redmineflux Workload Plugin adds a clearer planning layer on top of Redmine. It helps teams compare assigned work against available capacity, review workload across multiple people and projects, and make Redmine capacity planning more practical inside the same workspace where delivery is already being tracked.

5. When should a team move from native Redmine planning to Redmineflux?

Usually when task assignment is still working, but planning confidence is not. If sprint commitments feel optimistic, managers are using spreadsheets to balance capacity, or shared resources are hard to review across projects, that is usually the point where Redmineflux becomes a practical next step.

Categories
Informational

How to Track Time in Redmine Using the Redmineflux Timesheet Plugin

Redmine has built-in time logging. Users can log hours against any issue. But native time logging is not the same as time tracking — there are no consolidated timesheet views, no approval workflows, no billing rates, and no reporting by project or client. This guide covers what Redmine’s default setup provides, where it stops, and how the Redmineflux Timesheet Plugin completes the time tracking workflow.

What Redmine’s Default Time Logging Provides

What Redmine Does by Default

Redmine’s core time logging is simple and functional. Teams can log hours directly against any issue. Each entry accepts an hour value, an activity type, and a comment.

Redmine natively supports:

  • Logging time against individual issues with a date and activity type
  • Viewing all time entries in a flat, filterable list
  • Basic time reports filtered by project, user, or date range
  • Role-based permission control for who can log and view time

This gives teams a basic record of hours worked. It is sufficient for teams that only need to know time was logged.

What Redmine Does Not Provide

The gap becomes clear when teams move from informal logging to structured time governance. Redmine’s default setup stops well short of what billing-focused or compliance-conscious teams need.

What is missing from Redmine out of the box:

  • No consolidated per-person timesheet view across projects
  • No weekly or monthly timesheet submission interface
  • No manager approval workflow for submitted timesheets
  • No billing rates — standard, overtime, or role-based
  • No billable versus non-billable classification for time entries
  • No client-facing time report export formatted for invoicing
  • No budget versus actual comparison at project or user level
  • No time entry locking after a billing period closes
  • No submission deadline reminders for outstanding timesheet entries

These are not edge-case requirements. They are standard needs for any team billing clients from Redmine data.

What Is the Redmineflux Timesheet Plugin?

Answer capsule: The Redmineflux Timesheet Plugin adds consolidated timesheet views, manager approval workflows, billing rate management, billable and non-billable categorisation, and time reporting to Redmine. It works on top of Redmine’s native time log entries — no duplicate data entry. Compatible with Redmine 5.0.x, 5.1.x, and 6.0.x.

The Timesheet Plugin is not a replacement for Redmine’s time logging. It is a structured governance layer built on top of it. The same time entries your team logs against issues become the source of record for approvals, billing, and reporting.

Teams using the plugin do not change how they log time day to day. They gain a structured layer around that data — approval workflows, billing classifications, consolidated views, and exportable reports — that turns informal entries into a reliable, auditable record.

This matters most for service teams, consultancies, and internal delivery functions. These teams need time data that finance can trust, clients can review, and audits can verify.

Key Capabilities of the Timesheet Plugin

Consolidated Timesheet View

Redmine’s default time log shows entries in a flat list. That list does not show you what a single team member worked on across all their projects in a given week.

The Timesheet Plugin changes this with a per-person weekly and monthly timesheet view. All hours logged by a user are visible in one structured interface. Managers can review what was worked on without navigating project by project. Team members see their own timesheet clearly before submitting for approval.

This single change removes a significant amount of manual effort from weekly time review.

Timesheet Submission and Approval Workflow

Unreviewed time entries have no real audit value. The plugin introduces a defined approval workflow that closes this gap.

Team members review their logged entries and submit a completed timesheet for manager review. Managers approve or reject each submission, with the option to add a rejection comment explaining what needs correction. The submitter can then revise and resubmit without leaving Redmine.

Every submission and approval is timestamped and tied to a named user. This creates an auditable record of approved hours. That record is directly useful for client billing, compliance, and internal cost reporting.

Billing Rates

Most Redmine environments have no mechanism for distinguishing billable from non-billable time. The Timesheet Plugin adds this capability in two parts.

First, administrators can set billing rates per user or per role. Standard rates, overtime rates, and role-specific rates are all supported. Second, each time entry can be classified as billable or non-billable when it is logged or reviewed.

This gives agencies and service teams a structured path from logged hours to invoice amounts. Finance teams can run billing reports from approved, classified time data rather than reconstructing hours from spreadsheets.

Time Reports

Reports built from unvalidated time data are unreliable. The Timesheet Plugin generates reports from approved entries only.

Filters are flexible. Reports can be scoped by project, team member, date range, activity type, or billing status. Export options include CSV and PDF. Project managers use these reports for effort distribution reviews. Finance teams use them to generate client invoices directly from logged and approved hours.

This removes the need for a separate billing or reporting tool for time data that already lives in Redmine.

Integration with Redmine Issues

The Timesheet Plugin does not create a parallel data model. It reads the same time entries already linked to Redmine issues.

This matters for data integrity. An entry logged on a specific issue remains associated with that issue. It also appears in the timesheet view for that user, feeds into approval workflows, and shows up in filtered reports. There is no duplicate entry and no data migration.

From the timesheet view, managers can drill down into the specific issue or project associated with any entry. Time data and issue data stay connected throughout the workflow.

How to Set Up the Timesheet Plugin in Redmine

Step 1 — Install the Plugin

Upload the plugin folder to your Redmine installation directory. The standard path is Redmine/plugins/timesheet.

Once uploaded, run the following commands from your Redmine root:Step 2 — Configure Plugin-Level Settings

Go to Administration → Plugins → Timesheet → Configure.

Set your billing rate defaults for the instance. Configure the approval workflow — enable or disable it based on your team’s process requirements. Set which activity types are classified as billable by default. These settings apply across all projects that enable the Timesheet module.

Step 3 — Enable Timesheet for a Project

The plugin must be activated per project. Go to Project → Settings → Modules tab → Enable Timesheet → Save.

Once enabled, the Timesheet tab appears in the project navigation. Team members assigned to the project can access their timesheet view. Project managers can access approval queues and reports for that project.

Step 4 — Set Up Billing Rates Per User or Role

Go to Administration → Timesheet → Billing Rates.

Assign standard hourly rates per user or per role. If your team uses overtime rates for specific conditions, configure those here as well. Role-based rates are useful for teams where billing differs by seniority or function rather than by individual.

Step 5 — Submit and Approve Timesheets

For team members: Go to Timesheet → My Timesheet → Select week → Review entries → Submit

Review logged entries for the selected period. Confirm accuracy before submitting. Once submitted, the timesheet moves to the manager’s approval queue.

For managers: Go to Timesheet → Approvals → Review submitted timesheets → Approve or Reject

Approve entries that are correct. Reject entries that need revision, with a comment explaining the required change. Rejected timesheets return to the submitter for correction and resubmission.

Step 6 — Generate Time Reports

Go to Timesheet → Reports.

Apply filters for the report scope: project, user, date range, activity type, or billable status. Review the results in the interface or export to CSV or PDF. Use CSV exports for finance team invoicing workflows. Use PDF exports for client-facing time reporting or internal management reviews.

Who Gets the Most Value from the Timesheet Plugin

Project Managers

Project managers gain clear visibility into how team effort distributes across issues and projects. They can compare logged hours against original estimates within Redmine. Approval workflows run inside the platform, so there is no chasing approvals across email.

Engineering Leads

Engineering leads can review each developer’s weekly hours across all active projects from a single view. This makes it easy to spot overload or underutilisation before it affects delivery timelines. No separate reporting tool is needed.

Finance and Billing Teams

Finance teams can generate accurate client invoices directly from approved, billable time entries. The data is already structured, classified, and validated. Teams no longer need a separate time tracking tool running alongside Redmine.

IT Directors

IT directors can enforce consistent timesheet submission standards across all projects. Every approved timesheet creates an auditable record with timestamps and named approvers. This audit trail is available for export and supports both internal governance and client-facing compliance requirements.

How the Timesheet Plugin Connects with Other Redmineflux Plugins

The Timesheet Plugin works within the same Redmine project structure as the rest of the Redmineflux suite. Three integrations deliver particularly clear operational value.

  • Timesheet entries link to sprint issues tracked on the Agile Board Plugin — actual hours feed into sprint review without a separate data step.
  • Approved time data complements the resource loading view in the Workload Plugin — compare planned capacity to actual hours logged across the team.
  • Time logs against project issues feed into timeline views in the Gantt Chart Plugin — effort visibility runs alongside the delivery schedule in one workspace.

Common Questions About Redmine Time Tracking

Does the Timesheet Plugin replace Redmine’s time logging?

No. It builds on top of Redmine’s existing time entries. Your team logs time the same way — the plugin adds structure like timesheets, approvals, and reporting.

Can I track billable vs non-billable time?

Yes. You can classify each entry as billable or non-billable and filter reports accordingly.

Is timesheet approval mandatory?

No. The approval workflow is optional and can be enabled based on your process.

Can I export reports for invoicing?

Yes. Export reports in CSV or PDF for billing and client reporting.

Which Redmine versions are supported?

Redmine 5.0.x, 5.1.x, and 6.0.x.

Redmine’s default time logging is a starting point, not a complete solution. The Redmineflux Timesheet Plugin closes the gap between informal time capture and structured time governance. Teams get consolidated views, approval workflows, billing classifications, and exportable reports — all running inside the Redmine environment they already use. That means accurate billing, reliable reporting, and a clear audit trail without adding another tool to the stack.

View Timesheet Plugin — Full feature details and pricing Get Free Demo — See it running in a live Redmine environment Explore Managed Cloud — Managed Redmine with the Timesheet Plugin pre-configured

Categories
Informational

Best Redmine Plugins in 2026 — 10 Plugins That Add Real Operational Value

Redmine remains one of the most practical project management platforms for teams that want control, flexibility, and self-hosted deployment. What changes the experience in 2026 is not Redmine alone. It is the plugin layer you add on top.

Most teams outgrow default Redmine in the same places. They want visual agile execution, better time governance, workload visibility, stronger documentation, client billing, dashboards, and more structured QA. The right plugins close those gaps without forcing a migration to a completely different platform.

This guide covers the best Redmine plugins in 2026 by use case. It is intentionally practical. Rather than listing random extensions, it focuses on the plugin categories that solve recurring operational problems for development, IT, delivery, and client-service teams.

What Makes a Redmine Plugin Worth Installing in 2026

Answer capsule: The best Redmine plugins in 2026 do more than add isolated features. They remove manual work, improve visibility, create governance, and fit naturally into existing Redmine workflows. A plugin is worth installing when it reduces tool switching, keeps data inside Redmine, and solves a real operational bottleneck for the team using it.

The strongest plugins usually share four traits. First, they solve a real workflow problem instead of adding cosmetic complexity. Second, they work with Redmine’s existing project structure, roles, and issue data rather than creating another silo. Third, they reduce manual coordination — spreadsheets, exports, duplicate entry, or status-chasing. Fourth, they remain useful at team scale, not just for one project manager configuring them on day one.

That is the lens used for this list.

The 10 Best Redmine Plugins in 2026

1. Agile Board Plugin — Best for Kanban, Scrum, and Sprint Planning

Agile Board Plugin Overview

If your team runs agile delivery inside Redmine, this is the plugin that changes daily workflow the most. The Agile Board Plugin adds Kanban boards, Scrum board mode, sprint containers, swimlanes, WIP limits, Story Points, custom saved boards, and backlog planning directly inside Redmine.

It is particularly valuable for teams that currently manage issues in Redmine but plan sprints somewhere else. With the Agile Board Plugin, planning and execution happen in one place. Project teams get a board for daily flow, managers get a Global Agile Board across projects, and backlog grooming becomes a native Redmine activity instead of a spreadsheet exercise.

Use it when:

  • your team needs Kanban or Scrum support inside Redmine
  • sprint planning is still happening outside the platform
  • project leads need cross-project delivery visibility

2. Timesheet Plugin — Best for Time Approvals and Audit-Ready Reporting

Timesheet Plugin Overview

Redmine can log time by default, but many teams need more structure than simple time entry. The Timesheet Plugin adds approval workflows, reporting, governance, and clearer audit trails around project time.

This is one of the best Redmine plugins in 2026 for service teams, consultancies, MSPs, and internal delivery teams that need validated time data rather than informal entries. It turns time tracking into a governed process: capture, review, approval, reporting, and export.

Use it when:

  • time needs approval before billing or reporting
  • finance and delivery teams need one trusted source of hours worked
  • audits or client reviews require better time traceability

3. Workload Plugin — Best for Capacity Planning and Resource Visibility

Workload Plugin Overview

One of the most common gaps in standard Redmine is resource visibility. Managers know what work exists, but not whether the team actually has capacity to take it on. The Workload Plugin closes that gap with workload planning, user-level allocation visibility, and capacity comparisons across projects.

This matters most for engineering leads, PMOs, and delivery managers who need to see overload before deadlines slip. It is a planning plugin, not just a reporting layer. It helps teams assign work with more realism.

Use it when:

  • the same people are shared across multiple projects
  • overload and underutilization are both recurring problems
  • sprint or release planning needs real capacity visibility

4. Gantt Chart Plugin — Best for Timeline Planning and Delivery Tracking

Gantt Chart Plugin Overview

When work spans milestones, dependencies, or fixed delivery dates, a board view is not enough. The Gantt Chart Plugin adds timeline planning, dependency management, baseline comparison, and schedule visibility to Redmine.

It is one of the best Redmine plugins for project managers who need both execution detail and schedule control. The board shows flow. The Gantt view shows time.

Use it when:

  • projects involve deadlines, dependencies, or milestone commitments
  • leadership needs visual schedule reporting
  • teams want to compare original plan versus current timeline

5. Dashboard Plugin — Best for Project Analytics and Stakeholder Reporting

Dashboard Plugin Overview

Redmine stores a lot of data but does not always present it in a useful way for fast review. The Dashboard Plugin adds configurable chart widgets, drill-down issue access, public dashboard sharing, global and per-chart date filters, and auto-refresh.

This is especially useful for project managers, PMOs, delivery heads, and IT leaders who need one visual place to review project health. It reduces the need to jump across separate report screens or export data just to answer a status question.

Use it when:

  • teams want one dashboard instead of multiple Redmine reports
  • stakeholders need read-only visibility without full Redmine access
  • project health needs to be reviewed visually and quickly

6. Invoice Plugin — Best for Turning Logged Time into Client Billing

For teams that bill clients from work completed in Redmine, the Invoice Plugin is one of the most operationally useful additions available in 2026. It generates invoices directly from Redmine time entries, supports customer records, billing rates, invoice templates, Draft to Sent to Paid lifecycle tracking, and Stripe payment links.

Its biggest value is removing the gap between logged work and invoice generation. Time is already in Redmine. This plugin turns that time into billable output without rebuilding it in another system.

Use it when:

  • invoicing still happens in spreadsheets or separate billing tools
  • hourly project work needs better traceability
  • finance teams want billing visibility without leaving Redmine

7. Knowledge Base Plugin — Best for Internal Documentation Inside Redmine

Knowledge Base Plugin Dashboard

Teams that run delivery in Redmine often keep documentation somewhere else — shared drives, Google Docs, Notion, or email threads. That split creates friction. The Knowledge Base Plugin brings documentation back into the same workspace as the issues and projects it supports.

It is a strong fit for internal SOPs, project runbooks, onboarding documentation, and reusable technical notes. Instead of treating documentation as a separate system, the plugin keeps it connected to the projects and work it explains.

Use it when:

  • documentation is fragmented across multiple tools
  • onboarding depends on tribal knowledge
  • teams want SOPs, technical notes, and project documentation inside Redmine

8. Test Case Management Plugin — Best for QA Workflow in Redmine

Test Case Management Plugin Dashboard

Development teams that already track issues in Redmine often struggle when QA lives elsewhere. The Test Case Management Plugin adds structured test case management, execution tracking, and QA workflow directly inside Redmine.

This is one of the best Redmine plugins in 2026 for teams that want issue tracking and quality management in one environment. It is particularly relevant for product teams, QA leads, and regulated environments where traceability matters.

Use it when:

  • QA still runs in spreadsheets or separate testing tools
  • release readiness depends on clearer test execution visibility
  • teams need stronger links between issues, tests, and delivery quality

9. Checklist Plugin — Best for Definition-of-Done and Process Enforcement

Checklist Plugin - Enforce Completion

Small workflow misses create disproportionate project risk. A task looks done, but a required review, document, test, or signoff never happened. The Checklist Plugin helps teams enforce repeatable completion standards at the issue level.

This is a deceptively high-value plugin. It does not try to become a large reporting tool. It improves consistency where it matters most: the moment a team says a piece of work is complete.

Use it when:

  • tasks close before all required steps are actually finished
  • teams need stronger definition-of-done enforcement
  • recurring process misses create avoidable delivery quality problems

10. Issue Template Plugin — Best for Standardizing Repetitive Work Intake

Issue Template Plugin - Reusable Templates

Many Redmine environments suffer from inconsistent issue quality. Some tickets are detailed. Some are nearly empty. Important fields are missed, which leads to clarification loops later. The Issue Template Plugin solves that by standardizing how issues are created.

This is one of the best Redmine plugins for teams with recurring ticket types: bugs, support requests, onboarding tasks, change requests, audits, test cases, or internal service workflows. It improves issue quality at the point of creation, where the cost of inconsistency is lowest.

Use it when:

  • teams create the same types of issues repeatedly
  • missing details delay handoffs and execution
  • project managers want more consistent work intake

Which Redmine Plugins Should Most Teams Start With

Not every team needs every plugin. The best starting stack depends on the operational problem you are solving first.

Development teams running agile delivery, the strongest starting combination is usually:

  • Agile Board Plugin
  • Timesheet Plugin
  • Workload Plugin
  • Gantt Chart Plugin

Service teams and client-billable work, a stronger starting combination is:

  • Timesheet Plugin
  • Invoice Plugin
  • Dashboard Plugin

Teams focused on process quality and documentation, the best initial layer is often:

  • Knowledge Base Plugin
  • Checklist Plugin
  • Issue Template Plugin

The practical approach is to start with the plugin that removes the biggest current bottleneck, then expand into the rest of the suite as the workflow matures.

Why a Unified Plugin Suite Usually Wins Over Random Add-Ons

The biggest hidden cost in plugin-heavy Redmine environments is not licensing. It is fragmentation. One plugin stores data one way, another uses a separate interface model, and a third introduces a workflow that does not match the rest of the system.

That is why cohesive plugin suites tend to outperform random add-ons over time. When plugins share the same issue base, role model, project structure, and workflow assumptions, the result is less duplication and less administrative overhead. Teams keep their data in one place. Managers get clearer visibility. Reporting becomes more reliable because the workflow is unified rather than stitched together.

That is also why many teams move from one-off plugin installation toward packs or managed Redmine environments once they see which workflows matter most.

Frequently Asked Questions

1. What is the best Redmine plugin for agile project management?

For teams running Kanban or Scrum inside Redmine, the Agile Board Plugin is usually the most important upgrade. It adds visual boards, sprint planning, backlog management, WIP limits, and a Global Agile Board without forcing teams into a separate tool.

2. Which Redmine plugin is best for time tracking and billing?

For governed time tracking, start with the Timesheet Plugin. For client billing built from logged hours, add the Invoice Plugin. Together, they create a cleaner path from time capture to invoicing.

3. Do I need separate plugins for workload planning and dashboards?

Usually, yes. Workload planning and analytics solve different problems. The Workload Plugin helps teams plan capacity and assignments. The Dashboard Plugin helps stakeholders review project data visually across charts and summary views.

4. Are Redmine plugins still worth investing in during 2026?

Yes, especially for teams that want to keep Redmine as their system of record. The right plugins let teams add agile planning, QA, billing, dashboards, and documentation without migrating to a more expensive SaaS platform or spreading delivery work across multiple disconnected tools.

5. Should I install plugins one by one or choose a plugin pack?

If you are solving one immediate workflow gap, start with one plugin. If your team already knows it needs multiple layers — agile planning, time governance, workload visibility, and reporting — a pack is usually the cleaner long-term choice because the plugins are intended to work together.

Redmine becomes much more capable when the plugin layer matches the way your team actually works. The best Redmine plugins in 2026 are the ones that remove friction, improve visibility, and keep operational data inside one structured workspace.

If you are evaluating which plugins to install first, start with the workflow bottleneck that costs your team the most time today. Then build from there.

Explore Redmineflux Plugins | Get Free Demo | Explore Managed Cloud